
Making fantastic orange chicken in an air fryer is my go-to trick for a takeout-quality meal at home that’s ready in under 30 minutes. This approach gives you that addictive crispy coating everyone loves, but without all the mess and oil of deep frying. It’s a game-changer for a quick, delicious dinner.
Your Guide to Better Than Takeout Orange Chicken
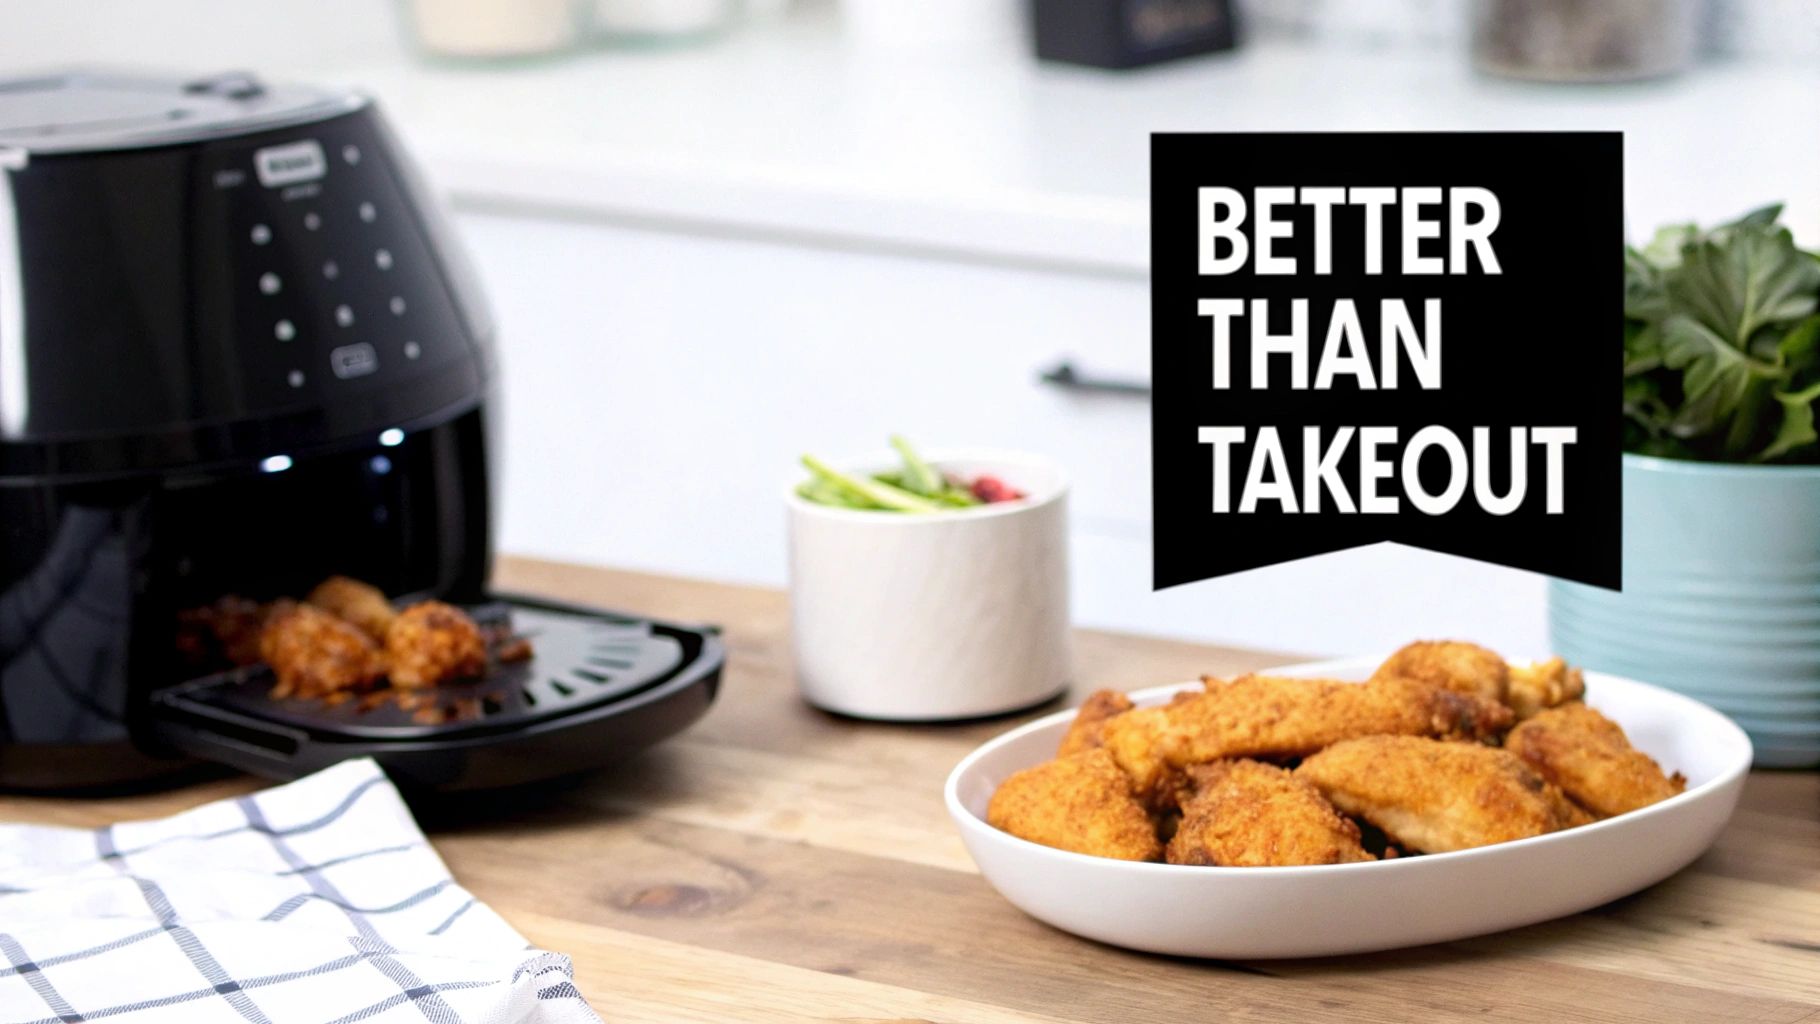
If you're hooked on that sweet and tangy orange chicken flavor but need a version that fits a packed schedule, you've found it. This recipe is for anyone—from busy professionals to home cooks—who wants a faster, more affordable, and lighter alternative to the usual greasy takeout.
The real magic happens inside the air fryer. By circulating incredibly hot air, it crisps the chicken to a perfect golden-brown using just a tiny bit of oil. Not only does this save you from a splattery deep-frying mess, but it also slashes the calorie count in a big way.
What Makes This Recipe Different
This isn't just another recipe; it's a reliable method that puts you in control. We'll walk through the simple, easy-to-find ingredients for both the chicken and that signature sauce. You'll learn how to tweak the flavor just right, balancing the sweetness of fresh orange with the savory depth of soy and ginger.
It's no surprise this dish is so popular. The boom in air fryer orange chicken recipes mirrors the incredible rise in air fryer ownership, which jumped from just 4% of U.S. households in 2019 to over 25% by 2023. These recipes don't just taste great; they often cut fat by a whopping 70-80% compared to their deep-fried counterparts.
The best part is getting that satisfying crunch without the guilt or the big cleanup afterward. It’s proof that you don't have to trade flavor for a healthier meal.
If you're just getting started with your air fryer, you'll find it can do so much more. You can discover more fantastic air fryer snack ideas to really make the most of your new favorite kitchen tool.
First, here’s a quick snapshot of what makes this recipe a weeknight winner.
Orange Chicken Air Fryer At a Glance
| Metric | Details | Benefit |
|---|---|---|
| Total Time | 25–30 Minutes | Perfect for a quick weeknight dinner. |
| Cooking Temp | 400°F (200°C) | Ensures a crispy exterior and juicy interior. |
| Key Advantage | Minimal Oil | Drastically reduces fat and calories. |
| Cleanup | Easy | No splattered oil or large pots to wash. |
As you can see, it's designed to be simple, fast, and incredibly satisfying.
Choosing Your Ingredients For Maximum Flavor

The best orange chicken air fryer meal doesn't come from a complicated list of obscure ingredients. It’s all about a handful of quality staples and knowing how each one contributes to that incredible, layered flavor we're all after.
Let's start with the chicken itself. While plenty of recipes suggest chicken breast, I've found that boneless, skinless chicken thighs are the real winners here. Their slightly higher fat content keeps them juicy and tender under the air fryer's intense heat, so you never have to worry about dry, stringy bites.
Selecting The Perfect Chicken and Coating
First things first, get your chicken cut into uniform 1-inch cubes. This is a crucial little detail. It guarantees that every piece cooks at the same rate, giving you consistent texture without any undercooked or overcooked surprises.
Now for that crispy coating. What you use for the dredge actually makes a big difference. All-purpose flour can work in a pinch, but it tends to make the coating a bit heavy and dense. For a truly light and crispy result, cornstarch or potato starch is the way to go.
- Cornstarch: This is my old reliable. It's easy to find and gives you a fantastic, light crunch that holds up perfectly when you toss it in the sauce.
- Potato Starch: If you're chasing that ultra-crispy, almost shatter-in-your-mouth texture, potato starch is your best friend. It creates a more delicate, tempura-style crust.
No matter which you pick, the goal is a thin, even layer. You’re not creating a thick batter, just a light dusting that allows the air fryer to work its magic and gives the sauce something to grab onto.
Building The Signature Orange Sauce
This is where your dish goes from good to great, and fresh ingredients are absolutely key. Forget the bottled orange juice; it just doesn't have the bright, zesty punch of the real thing.
If you remember one thing, let it be this: use freshly squeezed orange juice and the zest from the peel. The zest releases essential oils that pack an intense orange aroma and flavor you simply cannot get from juice alone.
This fresh base is the star, supported by a few pantry heroes. Soy sauce brings that essential savory umami, while a splash of rice vinegar adds a sharp, clean tang to balance the sweetness. Grated fresh ginger and minced garlic provide the warm, aromatic backbone that pulls it all together. Trust me, the fresh versions are worlds better than the powdered stuff.
Have dietary needs? No problem. The swaps are simple:
- Gluten-Free: Just use tamari instead of soy sauce.
- Soy-Free: Coconut aminos work beautifully as a substitute.
Paying attention to these small details is what will make your homemade orange chicken air fryer recipe truly exceptional.
How To Get Perfectly Crispy Chicken Every Time
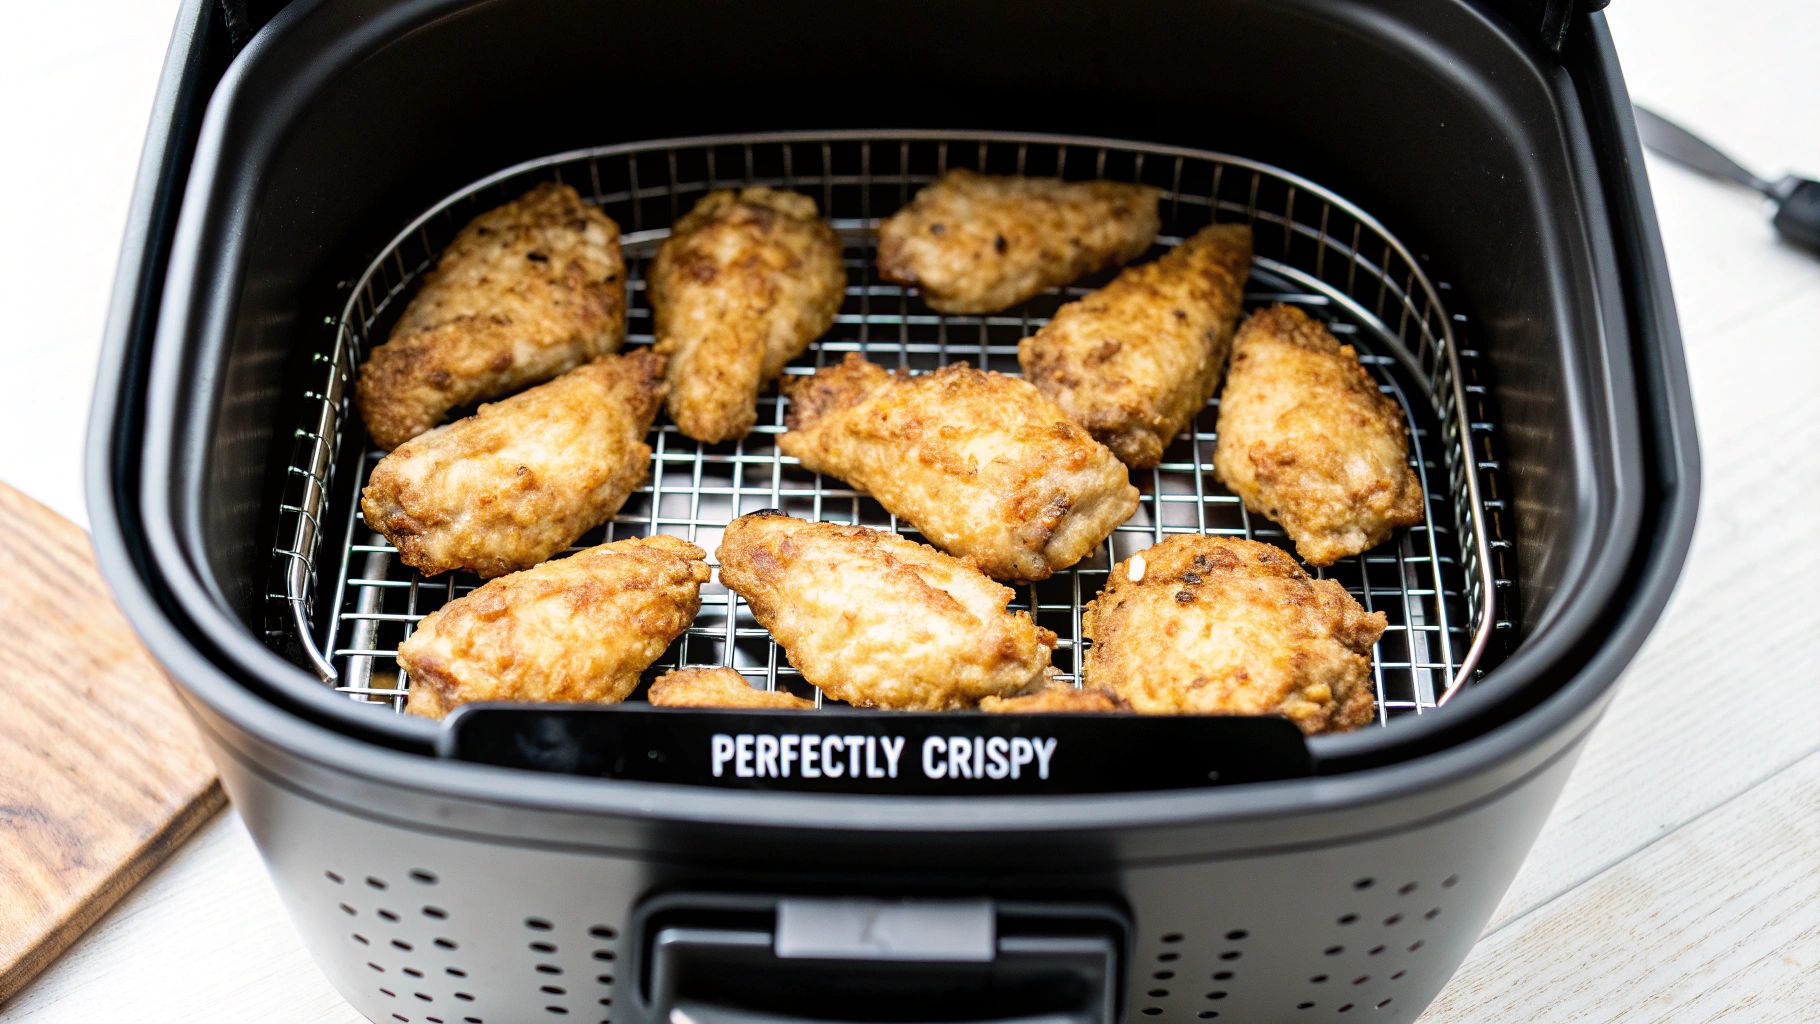
This is where the magic really happens. We're turning simple cubed chicken into those golden, irresistibly crispy bites that make orange chicken air fryer style so good. I’ve made this more times than I can count, and I'm sharing my go-to method for getting that perfect crunch.
It all starts with an even coating. After you’ve tossed your chicken cubes in cornstarch, make sure to shake off any excess. What you want is a light, almost dusty layer—not a thick, clumpy batter. This super-thin coating is the secret to letting the hot air work its magic and create that delicate, crisp crust.
Nailing The Air Frying Process
Success here really comes down to a few non-negotiable rules. First, you absolutely have to preheat your air fryer. Just like an oven, it ensures the chicken starts cooking the second it hits the basket, which is critical for getting that crispy exterior.
The biggest mistake I see people make? Overcrowding the basket. Your air fryer needs hot air to circulate freely around every single piece of chicken. Arranging the chicken in a single, even layer is the only way this can happen. If the pieces are piled up or touching, they’ll just steam and you'll end up with soggy, sad chicken. It's so much better to cook in batches if you need to—it’s worth the extra few minutes, I promise.
The single-layer rule is your golden ticket. Crowding the basket is the fastest way to sabotage that crispy texture you're working so hard to achieve.
On the bright side, this method is a massive health upgrade from takeout. Air fryer orange chicken slashes the calories by 50-75% per serving compared to the deep-fried stuff, turning a guilty pleasure into a totally reasonable weeknight dinner. Following these steps means you get all that satisfying crunch with just a tiny fraction of the fat.
Temperature, Time, and Technique
To get that perfectly cooked, juicy chicken, set your air fryer to 400°F (200°C). This high heat is what crisps up the outside so quickly, locking in all the natural juices. Your first cook time will be about 7-9 minutes.
Halfway through, you'll want to pull the basket out and give it a good shake. This simple move is key because it flips the chicken, ensuring every side gets exposed to the direct heat. That’s how you get a beautiful, uniform golden-brown finish.
The final, and most important, step is to check for doneness. While it might look done, the only way to be 100% sure is with an instant-read thermometer. Your chicken is ready and safe to eat when the internal temperature hits 165°F (74°C). This step takes the guesswork out and guarantees juicy, tender chicken every single time. And hey, if you're new to the air fryer game and want more simple ideas, you might like our guide on how to toast a bagel in the air fryer.
Crafting The Perfect Sweet And Tangy Orange Sauce
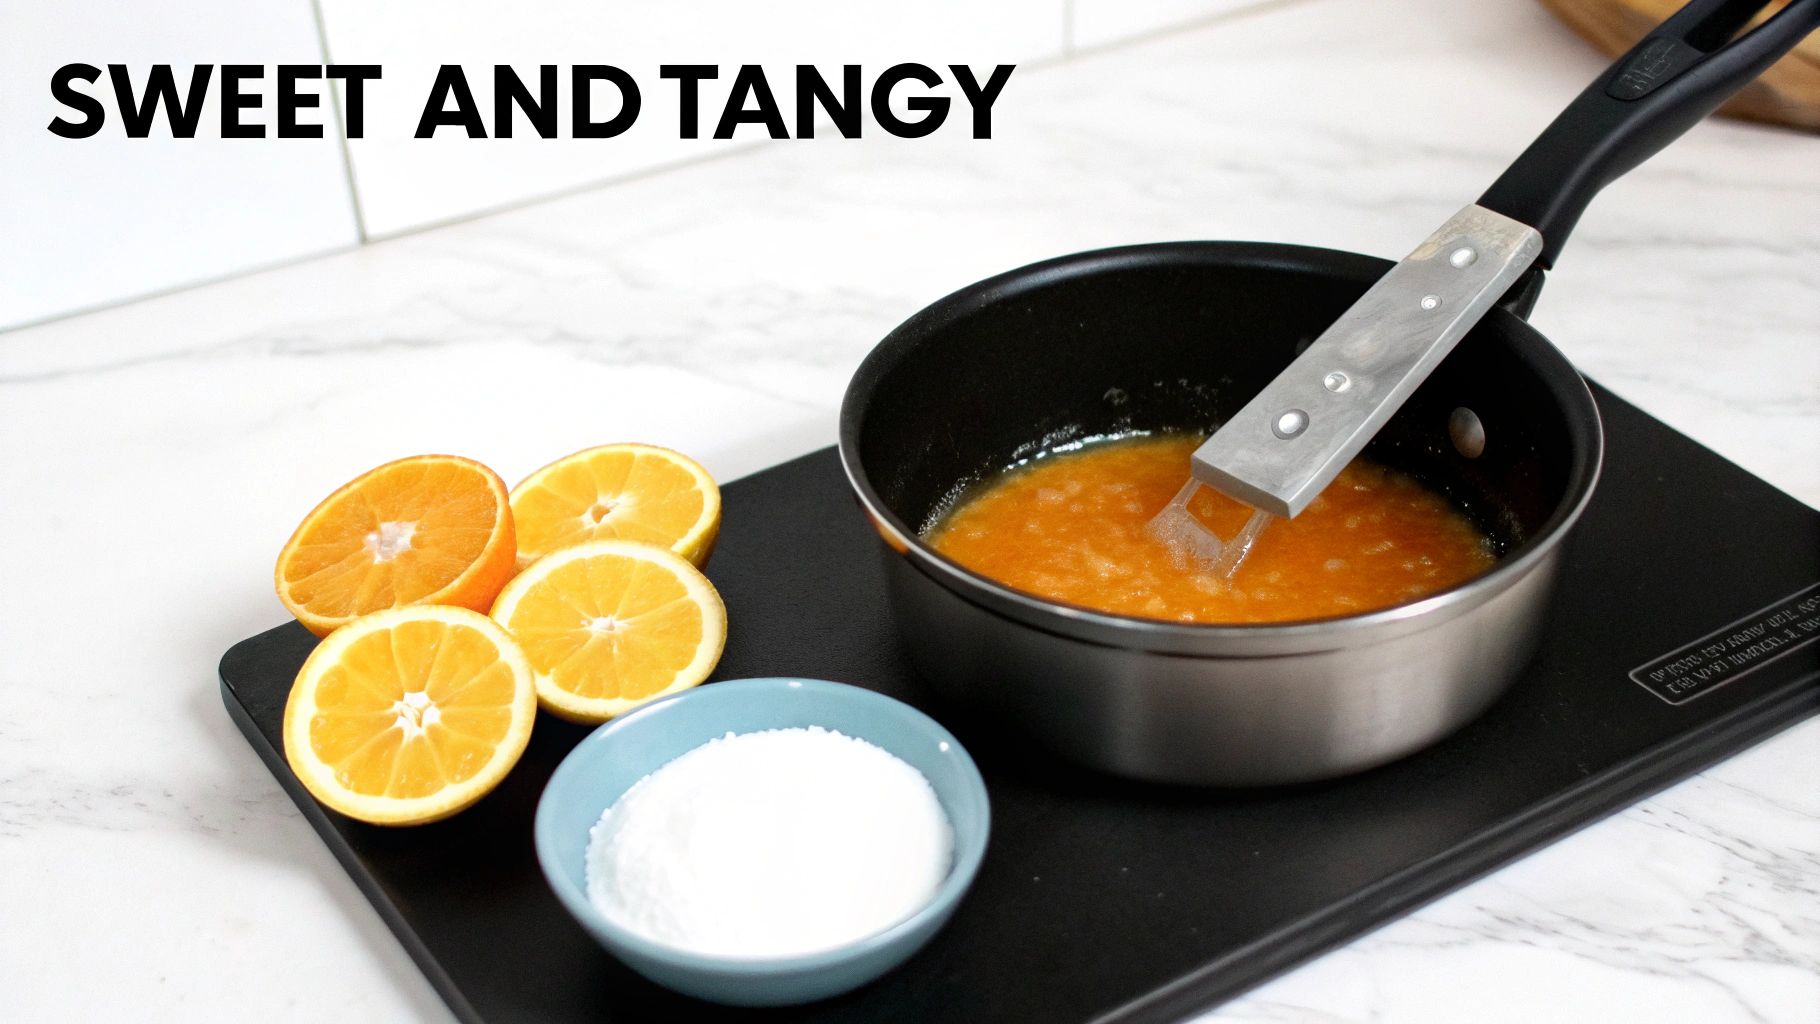
While the chicken is getting all golden and crispy in the air fryer, it's the perfect window to whip up the sauce. This isn't just any old glaze; it's a bright, zesty sauce that truly makes the dish. Best of all, it comes together in just a few minutes on the stovetop and tastes worlds better than that syrupy bottled stuff.
The secret to a great sauce starts with a fragrant base. I like to get a small saucepan going over low-medium heat with a little bit of oil. Toss in the minced garlic and grated ginger and just let them warm through until you can smell them, which only takes about 30-45 seconds. You’re just waking them up, not browning them—any color here will make the sauce bitter.
Combining Your Sauce Ingredients
Once your kitchen smells incredible, it's time to build the flavor. Pour in the fresh orange juice, soy sauce, and rice vinegar, giving it a good stir to mix with the garlic and ginger. Then, add your sugar or honey. This is all about balancing the tang from the juice and vinegar.
Now, here’s the most critical part of making a fantastic sauce for your orange chicken air fryer meal: thickening it properly. For this, we need a cornstarch slurry. It’s a simple mix of equal parts cornstarch and cold water, whisked until it's completely smooth.
I can't stress this enough: never, ever dump dry cornstarch straight into hot liquid. It will seize up into a clumpy mess that you'll never get smooth. Always mix it with cold water first!
Achieving The Perfect Consistency
Bring the sauce to a gentle simmer, then slowly pour in the cornstarch slurry while whisking constantly. You’ll see the magic happen almost instantly as the sauce starts to thicken and get that beautiful glossy sheen. Keep it simmering and stirring for another minute or so until it's thick enough to coat the back of a spoon. Think thin syrup.
This is also your chance to play around with the flavor. A pinch of red pepper flakes is great if you like a little kick of heat. My personal favorite trick is to add just a tiny drop of sesame oil after I've taken the sauce off the heat. It adds this amazing, nutty depth that really takes it over the top.
Bringing It All Together: Serving & Storing Your Orange Chicken
Alright, this is the moment we've been waiting for—combining that perfectly crispy chicken with the glossy, sweet-and-tangy orange sauce. The timing here is everything. Seriously, this one little detail makes all the difference.
The secret? Don't toss the chicken in the sauce until you are literally seconds away from serving it. If it sits for too long, that beautiful crust you worked so hard for will get soggy. I like to use a big mixing bowl to gently fold everything together. This gives you enough space to coat every piece evenly without crushing the breading.
What to Serve with Your Orange Chicken
Now that you've got your masterpiece ready, what do you serve it with? The great thing about orange chicken is how well it plays with others. You can go classic or get creative.
Here are a few of my go-to pairings:
- The Classic Takeout Vibe: You can't go wrong with a bed of fluffy jasmine or basmati rice. A side of steamed broccoli or some quickly sautéed bell peppers adds a nice pop of color and makes it a complete meal.
- Keeping It Low-Carb: This dish is fantastic over cauliflower rice or even quinoa. I also love it with a side of steamed green beans tossed with a few sesame seeds.
- Party Appetizer: Hosting a get-together? Just pile the sauced-up chicken onto a platter and stick some toothpicks in. A good sprinkle of sesame seeds and sliced scallions on top makes it look instantly impressive.
Smart Storage for Later
This recipe is a meal-prepper's dream. The trick to making it work, though, is keeping the chicken and sauce separate until you're ready to eat.
If there's one tip to remember for leftovers, it's this: store the crispy chicken and the orange sauce in their own airtight containers in the fridge. This is the only way to avoid a sad, soggy mess when you reheat it.
Kept this way, both the chicken and the sauce will be good for up to 3 days. It's a lifesaver for quick lunches or those nights when you just don't have the energy to cook.
When you're ready for round two, reheating is a breeze. Just toss the chicken back in the air fryer at 375°F (190°C) for 5-6 minutes until it's hot and crispy again. While that’s happening, warm the sauce gently in a small saucepan or give it a quick zap in the microwave. Combine, and you’ve got a meal that tastes almost as good as it did the first time.
Common Questions About Air Fryer Orange Chicken
Even the most straightforward recipes can leave you with a few questions. I've been there! So, I've gathered the most common questions and hurdles I hear about when making orange chicken air fryer style. Think of this as your personal troubleshooting guide, straight from my kitchen to yours.
From quick ingredient swaps to reviving leftovers, these are the tips that will help you nail it on the first try and feel more confident with your air fryer. Let's get into the little details that can take your dish from good to great.
Can I Use Frozen Orange Chicken?
Absolutely, and it's a lifesaver on busy nights. If you're using a pre-cooked frozen orange chicken, like the one from Trader Joe's, the whole process gets even easier.
First, get your air fryer preheating to 400°F (200°C). Tip the frozen chicken pieces right into the basket, making sure they're in a single, even layer. Overcrowding is the enemy of crispiness, so don't do it! I find that 12-15 minutes is the magic number for cooking time. Just remember to give the basket a good shake about halfway through to make sure every piece gets that golden, crispy finish.
While the chicken is doing its thing, you can warm up the sauce packet that came with it. The simplest method is just dropping it into a bowl of warm water. As soon as the chicken is hot and crunchy, toss it with the warmed sauce and get it on the table immediately for the best texture.
What Is The Secret To Extra Crispy Chicken?
Getting that perfect, shatteringly crisp coating really boils down to three key details I never skip. If you've ever ended up with a slightly soft coating, one of these is probably the reason why.
First up: your coating. While regular flour is okay, a pure starch like cornstarch or potato starch is what really delivers that signature light, crunchy crust. It's a simple swap, but it makes a world of difference.
Second, give your chicken room to breathe in the basket. This one is non-negotiable. Cooking in a single layer lets that hot air circulate and blast every single surface, crisping it up beautifully. If you need to cook in two batches to make this happen, trust me, it’s worth the extra few minutes.
The final, and maybe most important, secret is all in the timing. Only toss the hot, crispy chicken with the orange sauce right before you serve it. Letting it sit, even for a minute or two, is the fastest way to lose all that incredible crunch you just worked for.
What Is The Best Way To Reheat Leftovers?
The whole game with reheating orange chicken is avoiding a soggy mess. The only way to do that is to store the chicken and sauce separately. I always pop them into two different airtight containers in the fridge, and they’ll stay good for up to 3 days.
When you're ready for round two, the air fryer is your best friend again. Just place the leftover chicken pieces back in the basket and heat them at 375°F (190°C) for about 5-6 minutes. That's all it takes to heat them through and bring that wonderful crispiness right back to life.
As the chicken reheats, gently warm the sauce in a small pan on the stove or give it a quick zap in the microwave. Once everything's hot, toss it all together. It tastes almost as good as it did the first time. You can find more practical tips like this in our other air fryer recipe guides.
How Can I Make This Recipe Gluten-Free?
Making this recipe gluten-free is incredibly easy—it just takes a couple of simple swaps. The best part is that most of the ingredients are already naturally gluten-free.
For the crispy coating, just stick with cornstarch or grab another certified gluten-free option like tapioca starch.
The only other change is in the sauce: the soy sauce. You can substitute it with either gluten-free tamari or coconut aminos using the exact same measurement. I’ve used both, and they work perfectly, giving you that same savory, umami flavor without any gluten. Just be sure to double-check your labels, but everything else should be good to go.
At airfryersnackideas.com, we're dedicated to helping you master your air fryer with easy, delicious recipes. Explore more ideas and become an air frying pro by visiting us at https://airfryersnackideas.com.