
If you've ever tried making onion rings at home only to end up with a soggy, greasy mess, you're not alone. I’m going to show you how to get that perfect, pub-style crunch using your air fryer—and the secret to a crispy coating that actually sticks to the onion.
Why The Air Fryer Is Your Secret Weapon For Onion Rings
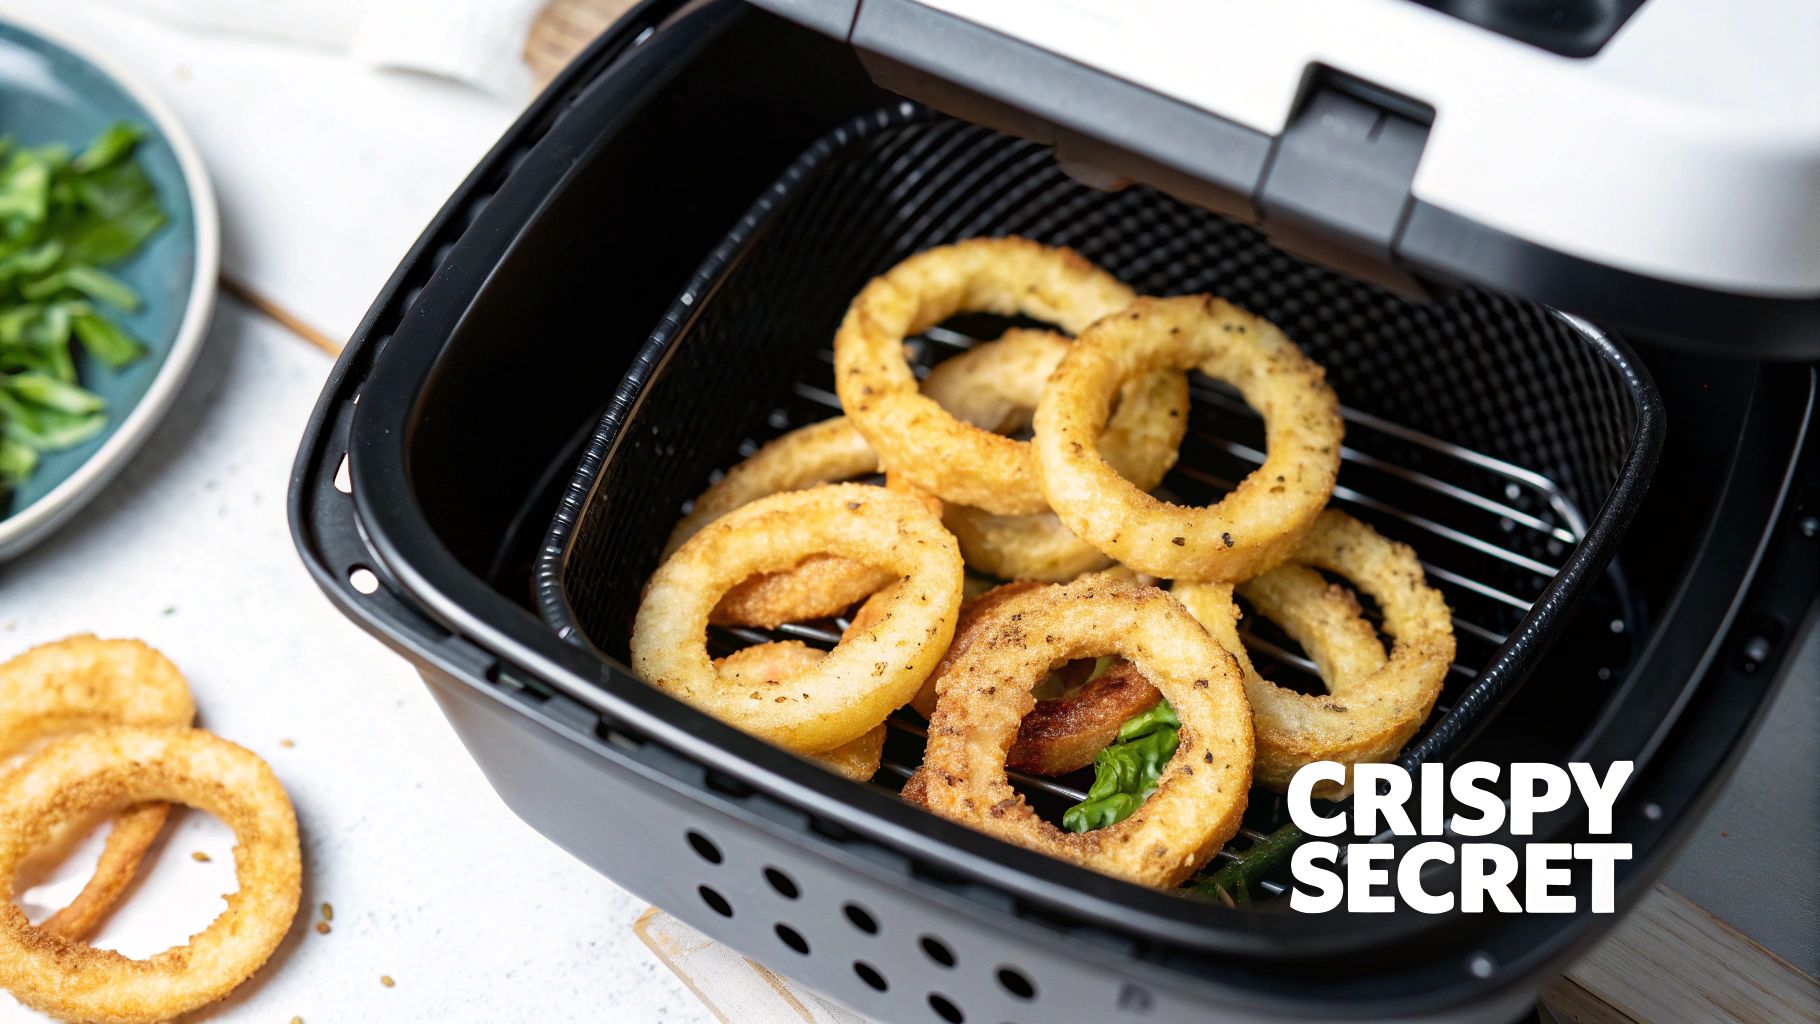
The magic of the air fryer is how it turns a notoriously greasy snack into something you can feel much better about eating. Instead of submerging the onion rings in a vat of oil, the air fryer circulates superheated air all around them. This high-speed convection mimics deep-frying, giving you that golden-brown exterior and satisfying snap with just a spritz of oil.
Less Guilt, All the Crunch
It's no surprise that people are turning to their air fryers for classic comfort foods. Healthier eating is a huge driver, with a whopping 78% of online searches for air fryer onion rings coming from people looking for better-for-you versions of their fast-food favorites.
When you swap deep-frying for air frying, you can slash the fat by as much as 60-70%. A typical deep-fried serving can pack around 275 calories, but the air-fried version comes in at a much more reasonable 80-110 calories. If you're curious, you can learn more about the rise of healthier fried foods and see how air frying is leading the charge.
Beyond the health perks, it's about getting consistent, delicious results. The contained basket cooks every ring evenly, so you avoid those dreaded burnt edges or pale, undercooked spots that often happen in a pan.
Here’s a quick rundown of what makes this method work so well.
Air Fryer Onion Rings Quick Guide
| Element | Recommendation | Why It Matters |
|---|---|---|
| Temperature | 375°F (190°C) | Hot enough to crisp the outside quickly without burning it, while perfectly cooking the onion inside. |
| Cooking Time | 10-12 minutes | This is the sweet spot for golden-brown perfection. Flipping halfway ensures even cooking. |
| Oil | A light spray of cooking oil | Just enough to help the breading brown and crisp up, without adding excess fat or calories. |
| Batch Size | Single layer, no overlapping | Overcrowding traps steam, leading to soggy onion rings. Spacing them out allows hot air to circulate freely. |
Ultimately, this recipe gives you everything you want from an onion ring—that incredible texture and flavor—while letting you control the ingredients.
The real trick to making fantastic onion rings in an air fryer is achieving a dry, crunchy coating that seals in the onion's natural sweetness. That constant rush of hot air is what makes it possible, wicking away moisture to create an unbeatable crunch.
So, get ready to say goodbye to the mess, the lingering smell, and the guilt of deep frying. With this guide, you’re just minutes away from crispy, golden perfection, made right on your countertop.
Choosing Your Ingredients for the Perfect Batch
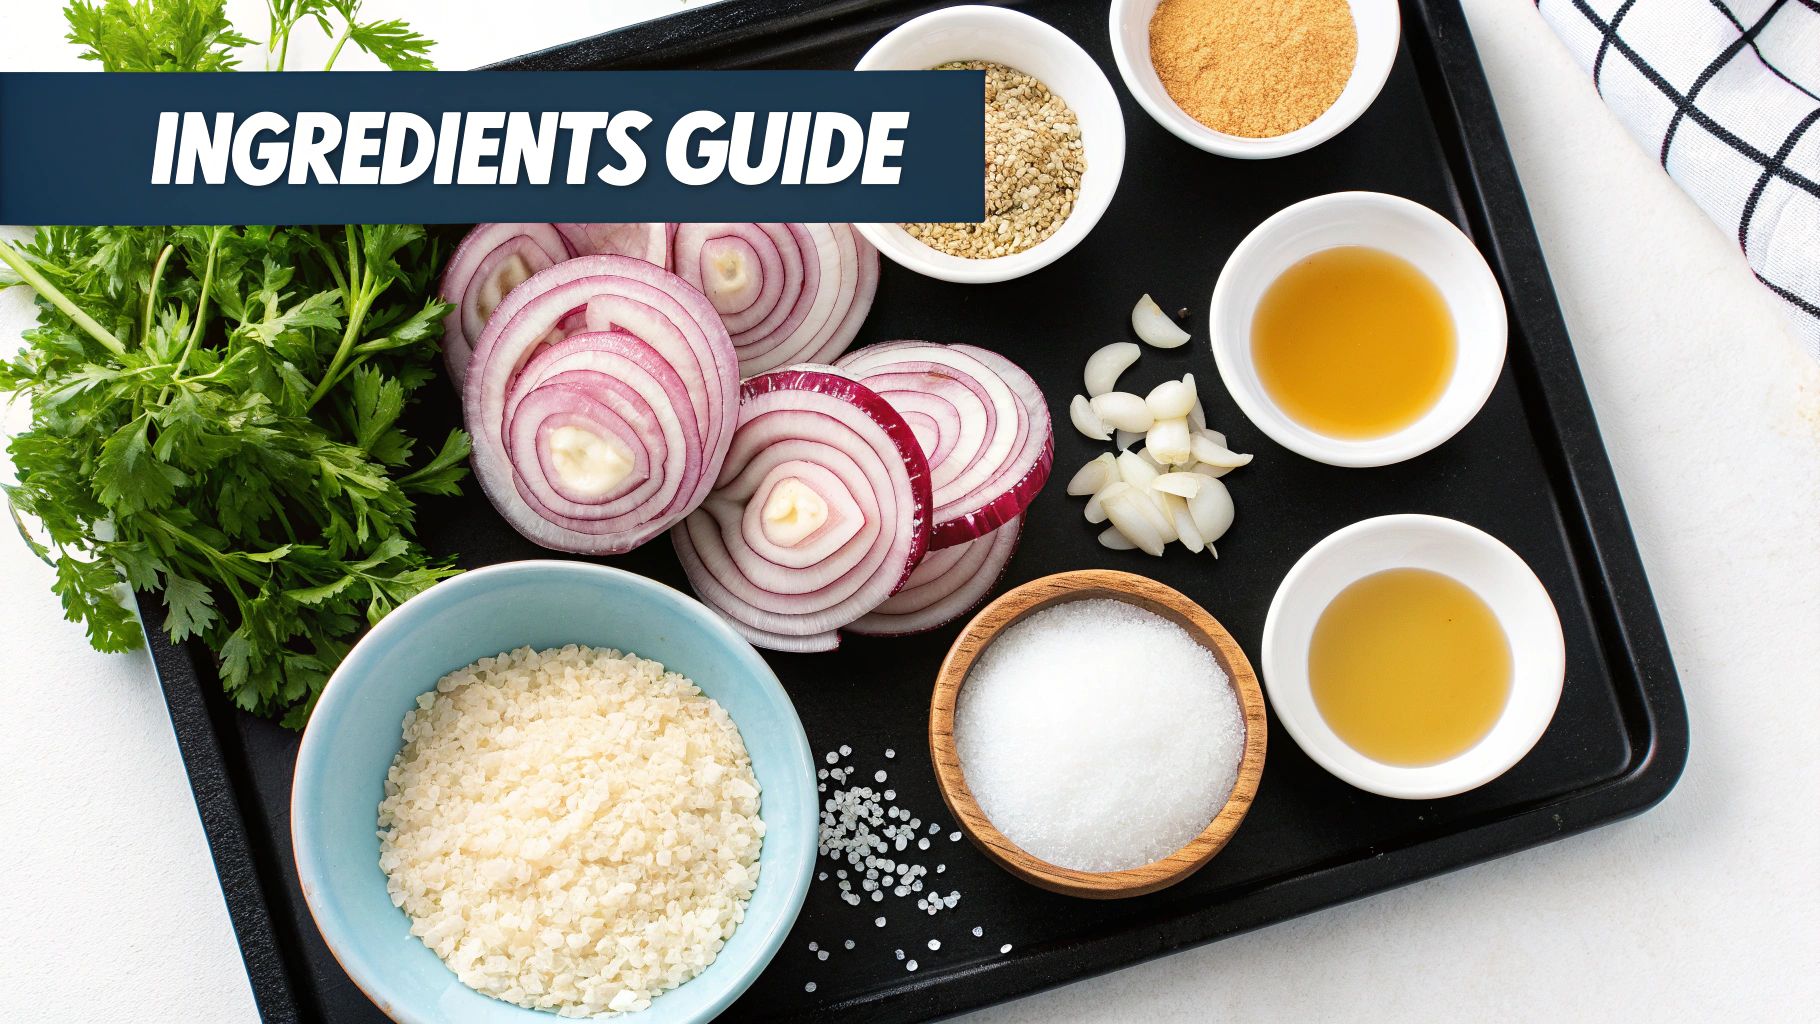
The secret to truly great onion rings isn't a fancy gadget—it's starting with the right ingredients. The choices you make at the store will decide whether you get a crispy, golden-brown masterpiece or a sad, soggy mess. Let’s talk about what you need to build the perfect batch from the ground up.
The star of the show is, of course, the onion. While you can technically use any onion you have lying around, I always reach for a sweet variety like a Vidalia, Walla Walla, or even a standard yellow onion.
Why these? They have a lower sulfur content, which means you get that mellow, sweet onion flavor that doesn't punch you in the face. More importantly for air frying, they hold less water. Less water means less steam, and less steam means a crispier finish.
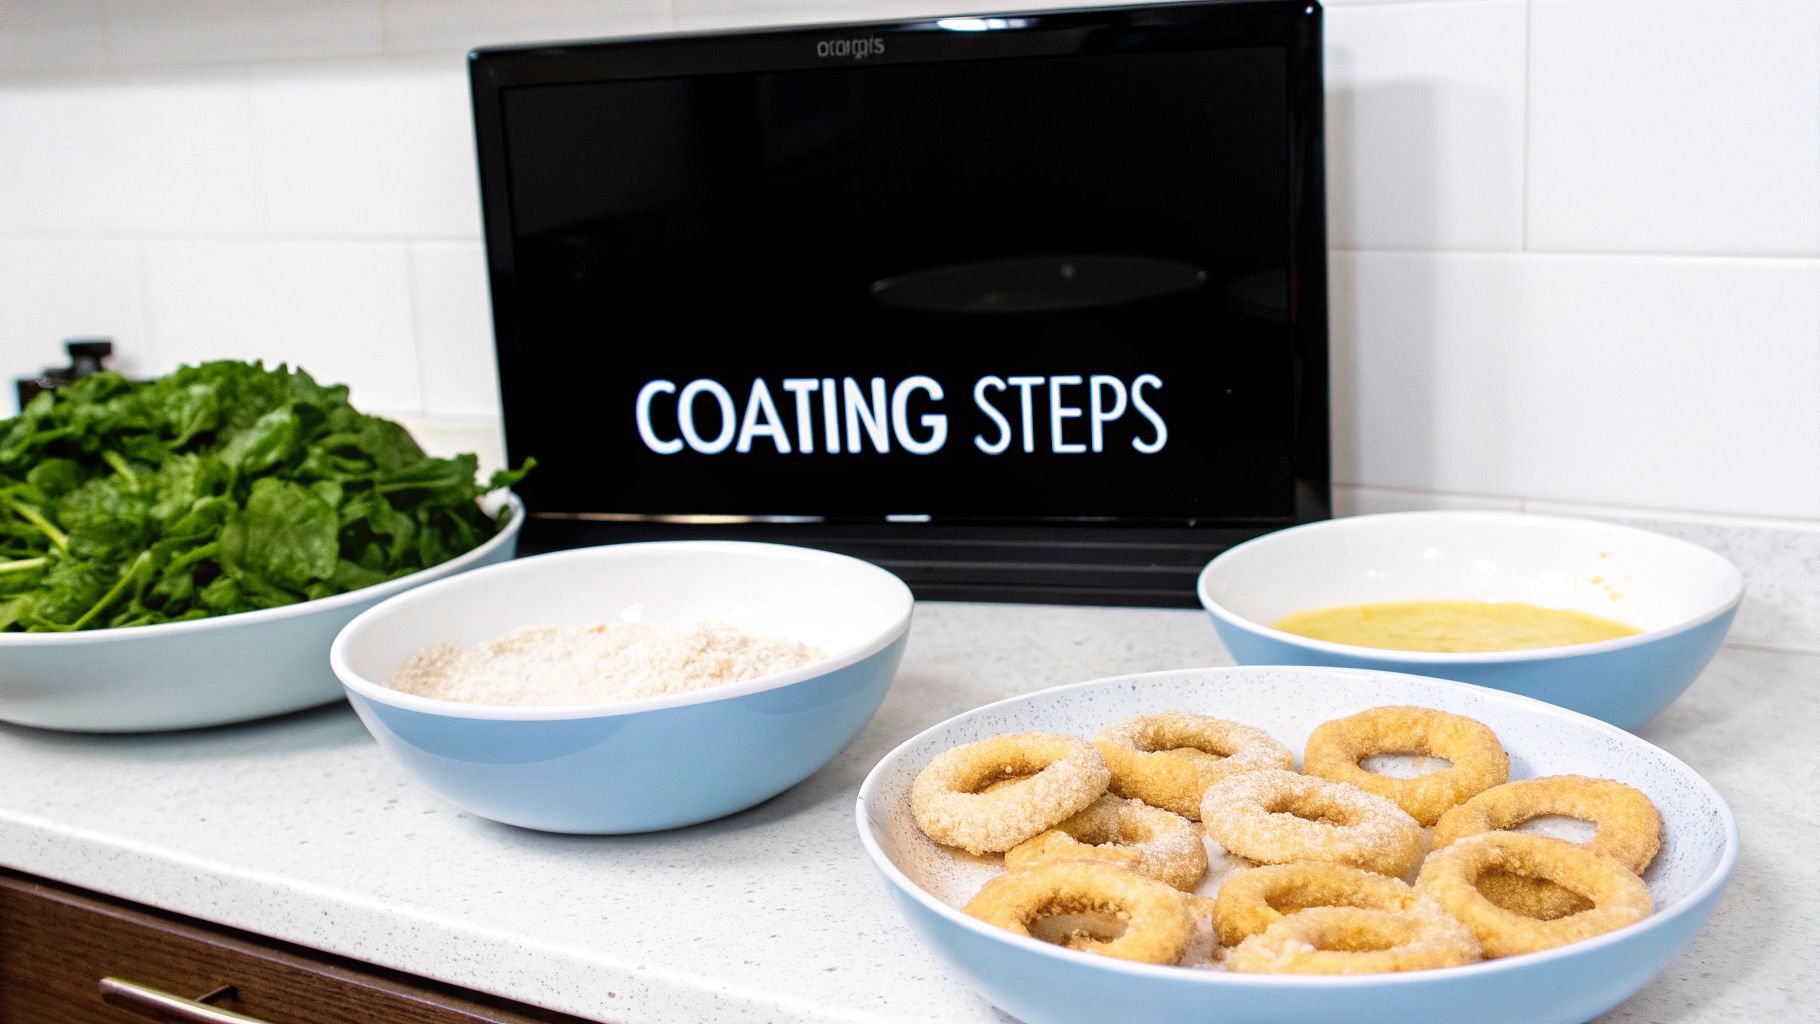
Building That Three-Part Breading
To get that classic, restaurant-quality crunch, you absolutely need a three-step coating process. I've tried shortcuts, and they just don't work. Each layer has a specific job, and when they work together, they create a crust that actually stays on the onion.
-
The Flour Dredge: Think of this as your primer. A simple coating of all-purpose flour, seasoned with a bit of salt and pepper, is your first stop. This dry layer gives the wet egg wash something to grab onto, preventing the dreaded "breading slide-off."
-
The Egg Wash Binder: Next up is the glue. Whisking an egg with a splash of milk or buttermilk creates the perfect sticky surface for the breadcrumbs to adhere to. If you have buttermilk, use it—it adds a subtle tangy flavor that really works well here.
-
The Crunchy Exterior: This is where the real magic happens. For the crispiest, lightest texture, Panko breadcrumbs are a must. Their flaky, airy structure creates a crunch that regular, dense breadcrumbs just can't match. Traditional breadcrumbs tend to get heavy and can even feel a little oily, but Panko stays light and super crunchy.
My Two Cents: The single biggest mistake I see people make is skipping that initial flour dredge. The slick surface of a raw onion ring is just too slippery for the egg wash to stick. Without that first flour coating, the breading will slip right off in the air fryer basket.
Don't Skip the Seasoning
Plain flour and breadcrumbs will give you crunch, but they won't give you flavor. This is your chance to turn your onion rings from just "good" into something truly addictive. Go beyond basic salt and pepper and really infuse your dry mixes with some personality.
Here are a few of my go-to spices to mix into the flour or the Panko:
- Smoked Paprika: It adds a gorgeous color and a warm, smoky depth.
- Garlic Powder: A classic for a reason. It provides that savory, aromatic base note that just belongs with onions.
- Onion Powder: It might sound redundant, but trust me, it intensifies the overall onion flavor in the best way.
- A Pinch of Cayenne: If you like just a whisper of heat in the background, this is the way to go.
This simple combo guarantees every bite is packed with flavor, not just crunch. Speaking of simple snacks done right, mastering the fundamentals is key for things like making a perfectly toasted bagel in an air fryer, too. It all starts with getting the basics down pat.
Your Step-By-Step Guide to Crafting Crispy Onion Rings
Alright, you've got your ingredients laid out, so let's get into the fun part. This is where a little bit of technique goes a long way. I’m going to walk you through my exact process, from how I slice the onion to the moment I pull that perfectly golden batch out of the air fryer.
Getting these steps right is the secret to breading that actually sticks, onions that cook through perfectly, and an outer shell that has that incredible crunch we're all after. Let's get to it.
Preparing the Onions and Dredging Station
First things first, let's talk about the onion. This step is probably the most critical for getting everything to cook evenly. You want to slice your onion into uniform rings, and I always aim for about 1/2 inch thick. If you go too thin, they'll burn before you know it; too thick, and the onion inside will still be raw when the outside is done.
After slicing, gently separate the layers into individual rings. Don't stress about the tiny rings from the center—I just toss those into a container for my next soup or stir-fry.
Now, set up your workspace. A well-organized dredging station is your best friend here, as it keeps the mess contained and the process moving smoothly. Just line up three shallow bowls or plates:
- Bowl One: Your seasoned flour mixture.
- Bowl Two: The whisked egg wash.
- Bowl Three: The seasoned Panko breadcrumbs.
Pro Tip: Try the "wet hand, dry hand" method. Use one hand for the dry bowls (flour and Panko) and the other for the wet bowl (egg). This little trick keeps you from ending up with fingers caked in a gluey paste.
The Art of the Double Dip Coating
Here's where the magic happens. We're going for a thick, sturdy crust that won't flake off in the air fryer. Grab one onion ring at a time and move it through your station.
Start by giving the ring a good toss in the seasoned flour, making sure it’s completely covered. This dry layer is essential because it gives the egg wash something to grab onto. Gently tap off any extra flour before moving on.
Next, dip the floured ring into the egg wash until it's fully submerged. Let the excess egg drip back into the bowl for a moment. A drippy ring will just turn your Panko into a clumpy mess.
Finally, press the egg-coated ring firmly into the Panko breadcrumbs. I mean really press it in there. Flip it over and press again to get every last spot covered. A fully coated ring is a crispy ring. As you finish each one, place it on a baking sheet or a clean plate.
Air Frying to Golden Perfection
Before you even start coating, get your air fryer preheating to 375°F (190°C). Hitting the rings with that initial blast of hot air is key to setting the crust right away.
Once it's hot, give the air fryer basket a light spray with cooking oil to prevent any sticking. Carefully place the onion rings in a single layer. I can't stress this enough—this is non-negotiable. If you overcrowd the basket, you'll trap steam, and you'll get soggy, sad onion rings. It's much better to cook in batches if you need to.
Give the tops of the onion rings a quick spritz of oil. This is what helps them develop that beautiful, deep golden-brown color.
Now, air fry for 10-12 minutes, and make sure you flip them about halfway through the cooking time. Every air fryer is a little different, so keep a close eye on your first batch to nail the timing. You’ll know they’re done when they are undeniably golden and crisp.
This air fryer method is a fantastic modern take on a classic snack that’s been around for over a hundred years. While the original recipes from the early 1900s relied on deep frying, today's techniques deliver incredible results with way less oil. Some creative methods even suggest marinating two sliced onions in a cup of buttermilk for a couple of hours before coating and air frying for just 5 minutes at 375°F to get a rich, tangy flavor. You can discover more about modern onion ring recipes and techniques to see just how much this simple snack has evolved.
Creative Variations and Dietary Swaps
Once you've nailed the classic air fryer onion ring, the real fun begins. This is where you can start playing around with different flavors and textures to create a batch that’s just right for you or anyone you're cooking for. The basic three-step coating method is a fantastic starting point, but it's also incredibly forgiving and easy to adapt.
Think of that breading as a blank canvas. Even small tweaks can completely change the game, turning your standard snack into something special.
Creating Low-Carb and Keto-Friendly Rings
If you’re watching your carbs or following a keto diet, traditional flour and breadcrumbs are obviously out. But that doesn't mean you have to give up on crispy, crunchy onion rings! I’ve had amazing results with a low-carb coating that holds up perfectly in the air fryer.
The secret is a one-two punch that gives you that Panko-like texture without the carbs:
- Almond Flour: This is your substitute for the regular all-purpose flour in the first dredging step. It’s naturally low in carbs and gives the egg wash something to grab onto.
- Crushed Pork Rinds: This is your new best friend for keto breading. Just blitz them in a food processor until they're coarse crumbs. They get unbelievably crispy and add a fantastic savory, salty flavor.
This combo gives you a deeply satisfying crunch that honestly makes you forget you're missing the bread. For more inspiration, you should check out all the other air fryer snack ideas on our blog.
Gluten-Free and Vegan Air Fryer Onion Rings
Making this recipe work for gluten-free or vegan diets is surprisingly simple these days. With all the great alternative products available, you won’t have to sacrifice an ounce of crispiness.
For a gluten-free version, just swap the all-purpose flour for a good 1-to-1 gluten-free flour blend. You can also find excellent gluten-free Panko breadcrumbs in most stores now, and they air fry just as beautifully as the original.
For a vegan version, the only thing you need to tackle is the egg wash. A flax egg works perfectly as a binder here. All you do is mix one tablespoon of ground flaxseed with three tablespoons of water. Let it sit for about five minutes to gel up, and you’ve got a sticky mixture that does a great job of holding the breading onto the onion.
The air fryer is really at the heart of the movement for healthier, diet-friendly snacks. Low-carb versions, for instance, can get a serving of onion rings down to just 110 calories and 7g of net carbs. It's amazing how a few smart ingredient swaps can transform a classic indulgence.
Injecting New Flavors into Your Breading
Beyond just dietary changes, the breading is your playground for flavor. Don't be afraid to open up your spice cabinet and experiment.
Here are a few combinations I absolutely love to mix into the Panko:
- Spicy Cajun Kick: Toss a tablespoon of Cajun or Creole seasoning into your flour for a little Southern heat.
- Cheesy Parmesan Crust: Mix finely grated Parmesan cheese right into the breadcrumbs. As it cooks, the cheese gets toasty and creates this incredible, savory crust.
- Smoky & Sweet BBQ: Add a blend of smoked paprika, a pinch of brown sugar, and some chili powder to the breading for that classic backyard barbecue vibe.
Troubleshooting Common Air Fryer Onion Ring Problems
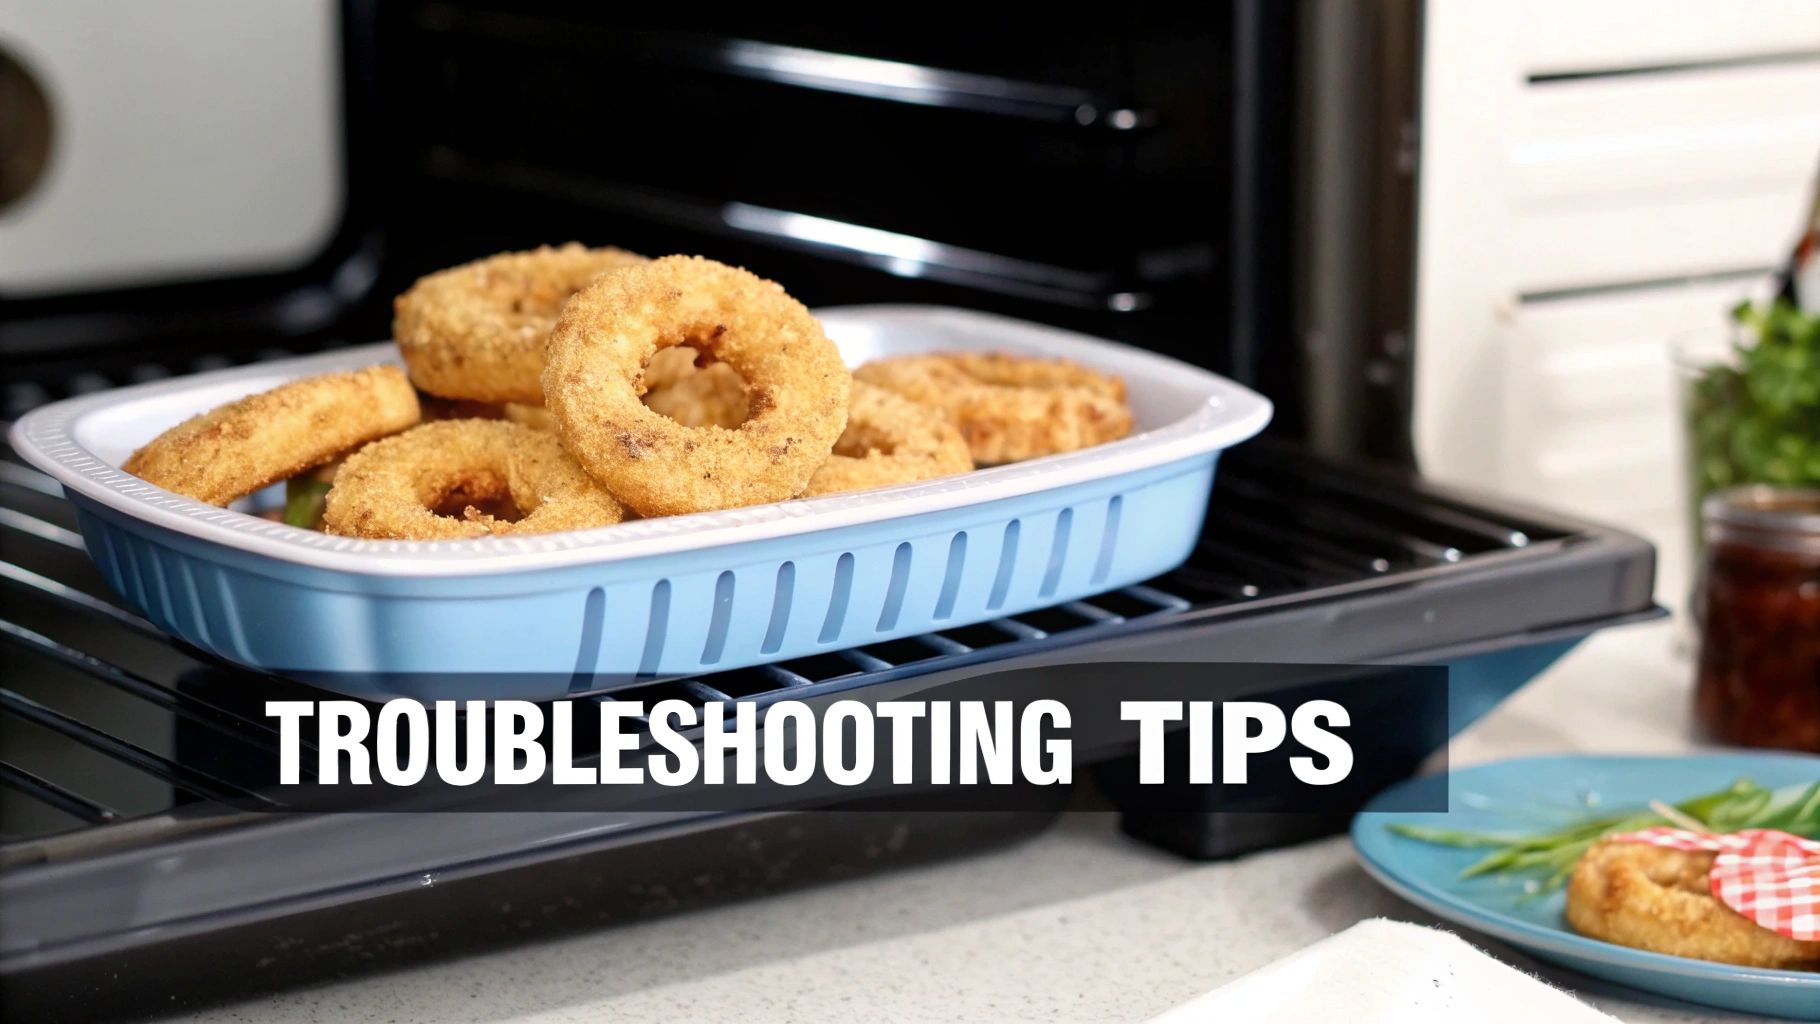
Even with a great recipe, things can go a little sideways. We’ve all been there: you pull out a batch of onion rings that are a bit pale, or worse, the breading has decided to abandon ship midway through cooking. Don't sweat it—these are super common hiccups with surprisingly simple fixes.
Let's walk through the most frequent snags people hit when learning how to make onion rings in an air fryer. A small tweak in your technique is usually all it takes to get back on track.
Why Is My Breading Sliding Off?
This is probably the most frustrating problem of all. You've carefully coated every single ring, only to watch the breading bubble up and slide right off in the heat. It almost always comes down to one of three things.
- You skipped the flour dredge. This first step is non-negotiable. Flour gives the wet egg wash something to grab onto. Without it, the slick surface of the onion has no grip, and the coating is doomed from the start.
- The egg layer was too thick. After dipping a ring in the egg, make sure you let all the excess drip off. A goopy, heavy layer of egg will just steam underneath the breadcrumbs, pushing the coating away from the onion.
- You didn't give them a chance to chill. This is my absolute number one tip. Once you've coated the rings, arrange them on a baking sheet and pop them in the fridge for 15-20 minutes. This little step is a game-changer; it helps the coating set and cling tightly, making it far less likely to fall off.
Chilling the coated onion rings before they hit the heat solidifies the breading. It creates a sturdy shell that crisps up beautifully instead of peeling away in the air fryer.
Solving Soggy or Unevenly Cooked Rings
Did your onion rings come out soft or with disappointing pale spots? The culprit is almost always an overcrowded basket. For that perfect, crispy crust, hot air needs to circulate freely around every single surface.
When the rings are piled up or even just touching, they trap moisture and steam each other. Those steamed spots are the soggy patches you’re trying to avoid. The fix is easy: always cook them in a single, flat layer. It’s so much better to cook in two or three small batches than to try and cram them all in at once.
Also, keep in mind that not all air fryers are created equal. Some models run hotter, and others have different fan patterns. Treat your first batch as a test run—keep a close eye on it and feel free to adjust the time or temperature for your specific machine.
What About Cooking Frozen Onion Rings?
Let's be real, sometimes you just don't have the time to make them from scratch. For store-bought frozen onion rings, the process couldn't be simpler.
Most brands are designed to go straight from the freezer into the air fryer. I've found that 375°F (190°C) for about 8-10 minutes is a great starting point. Just be sure to give them a good shake or flip them halfway through.
They should come out sizzling and perfectly golden-brown. You don't even need to add any oil, since most frozen varieties are pre-fried. It’s the perfect shortcut for a quick, hassle-free snack when that craving hits.
Answering Your Top Air Fryer Onion Ring Questions
Even when you've got the basics down, a few questions always seem to pop up in the kitchen. Getting the right answers can be the difference between a pretty good batch and a truly fantastic one.
Let's walk through some of the most common hurdles so you can air fry your onion rings with total confidence.
Can I Make Air Fryer Onion Rings Without Breadcrumbs?
Absolutely! While Panko breadcrumbs are my go-to for that classic, super-craggy crunch, they're far from the only game in town. A batter-style coating can also work beautifully, it just takes a slightly different approach.
The secret is to make a thick batter—aim for a pancake batter consistency. You'll use flour, a liquid like milk or even beer for flavor, an egg to bind it all, and your favorite seasonings. Dip each ring, let any excess drip off completely, and then carefully place them into your preheated and lightly greased air fryer basket. A thin, runny batter will just drip right through the holes, so thickness is non-negotiable here.
Feeling adventurous? You can also get creative with other crunchy coatings you might have in your pantry:
- Crushed cornflakes bring a surprisingly hearty, sweet-and-savory crunch.
- Crispy fried onions (yep, the kind from the can) double down on that onion flavor for a truly savory coating.
- Crushed crackers, like saltines or buttery round crackers, work in a pinch and add a nice toasted flavor.
How Do I Store and Reheat Leftover Onion Rings?
Let's be honest, onion rings are at their absolute peak fresh from the air fryer. But if you happen to have leftovers, you can definitely save them. The trick is all in how you reheat them to bring back that crunch.
First, let the rings cool completely before you even think about putting them away. Then, store them in an airtight container in the fridge for up to two days. When you're ready for round two, your air fryer is once again the hero.
Whatever you do, do not use a microwave to reheat onion rings. The steam it creates will instantly turn that beautiful crispy coating into a soft, soggy mess.
Preheat your air fryer to 375°F (190°C). Lay the leftover rings out in a single layer and heat them for just 3-5 minutes. They'll emerge hot, crispy, and almost as perfect as when you first made them.
Why Are My Onion Rings Not Getting Crispy?
This is easily the most common problem people run into, and the culprit is almost always the same: overcrowding the basket. That hot air needs room to blast every single surface of the onion ring. If they're all piled up, they just end up steaming each other.
Always cook in a single, even layer, leaving a little breathing room between each ring. It's much better to work in a couple of batches than to try and cram them all in at once.
A few other things to check: make sure you pat your raw onion slices dry before coating them to remove excess moisture. And always preheat your air fryer—tossing food into a cold basket is a one-way ticket to a soft, disappointing result.
For more delicious and easy snack recipes, be sure to check out airfryersnackideas.com. You can find all our latest creations at https://airfryersnackideas.com.