
Making perfect frozen mozzarella sticks in an air fryer is easier than you think. All it takes is a preheated air fryer set to 380°F and about 6 to 8 minutes of cook time. That’s it. No thawing, no extra oil, just perfectly crispy, golden-brown sticks with a gooey, melted cheese center.
Your Go-To Air Fryer Mozzarella Stick Guide
Let's face it: sometimes you need a good snack, and you need it fast. Whether it's for a last-minute get-together or just a serious craving, frozen mozzarella sticks are a classic. The air fryer has completely transformed them from a potentially soggy oven-bake into a crispy, restaurant-quality treat you can make in minutes.
This guide is my tried-and-true method for getting flawless results every time. It doesn't matter if you've been using your air fryer for years or just pulled it out of the box—you can master this.
Why the Air Fryer Is a Game Changer
So, what’s the secret? The air fryer works by blasting hot air all around the food, creating a powerful convection effect that acts like a miniature deep fryer, but without all the oil. For pre-cooked frozen foods like mozzarella sticks, this is where it really shines.
- Insanely Fast: Forget waiting for your conventional oven to heat up. You can go from freezer to dipping sauce in under 10 minutes.
- The Perfect Texture: You get that irresistible crunch on the breading while the cheese inside stays perfectly molten and stringy. No more soggy bottoms.
- A Lighter Option: Since you're not drenching them in oil, you get all that satisfying crispiness with a fraction of the fat.
- Cleanup is a Breeze: Most air fryer baskets are non-stick and can go right in the dishwasher. What’s not to love?
This isn't just a niche trick; it's how a huge number of people are cooking now. With air fryer ownership climbing to nearly 60% of U.S. households, it’s clear this appliance is here to stay. It's especially popular with Gen Z and college students, who often pick an air fryer over a microwave. If you're interested, you can explore more about this generational shift in cooking habits and its impact on the frozen food world.
Key Takeaway: If you remember only one thing, make it this: always cook your mozzarella sticks straight from the freezer. Do not thaw them. Thawing is the number one cause of soggy breading and cheese explosions.
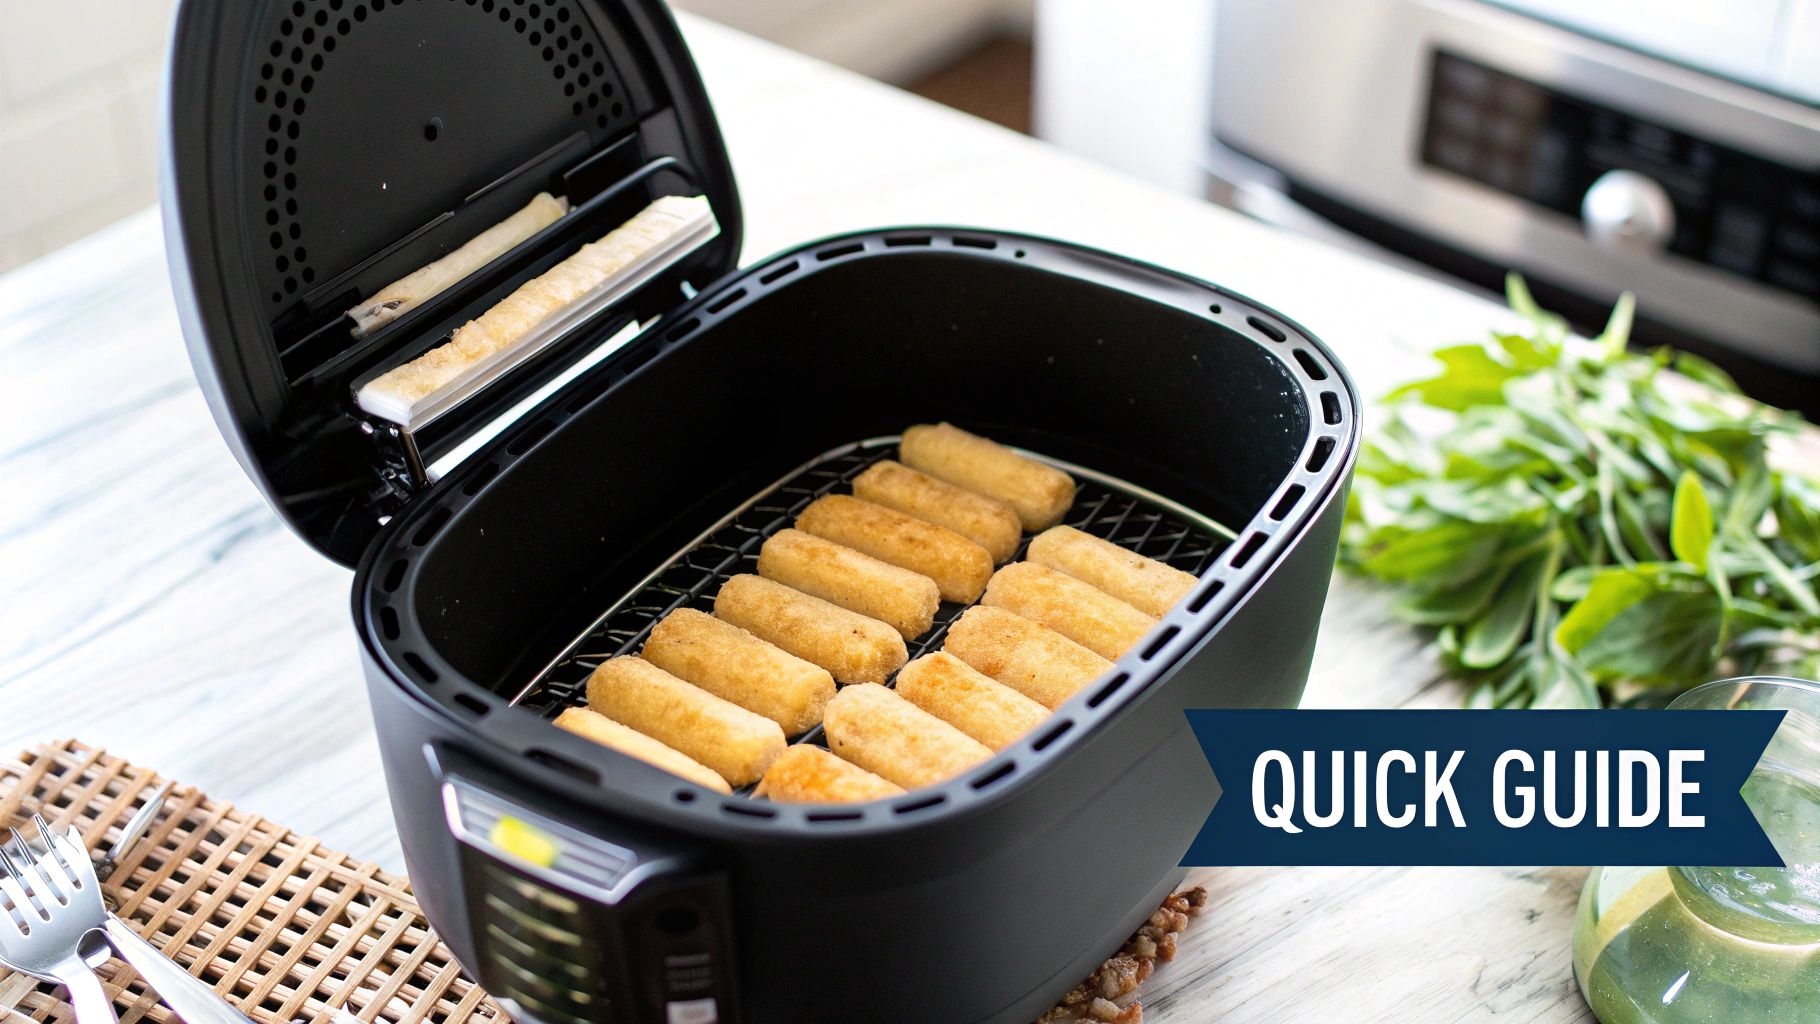
To help you get started, I've put together a quick-glance table with the settings that have worked best for me across different types of air fryers.
Quick Guide to Air Frying Frozen Mozzarella Sticks
This table summarizes the core settings to get you started. Remember that all air fryers are a little different, so you might need to adjust the time by a minute or two to find what works perfectly for your machine.
| Air Fryer Size | Temp Setting | Cooking Time | Pro Tip |
|---|---|---|---|
| Small (Under 4 qt) | 380°F (193°C) | 6–7 minutes | Work in small batches; do not overcrowd the basket. |
| Medium (4-6 qt) | 380°F (193°C) | 7–8 minutes | Shake the basket halfway through for the most even crisp. |
| Large (Over 6 qt) | 380°F (193°C) | 8–9 minutes | Spread sticks out well; you may need an extra minute for a full batch. |
Ultimately, these numbers are a great starting point. The goal is golden-brown and crispy sticks with no cheese leaking out. Keep an eye on them the first time you make them, and you'll be a pro in no time.
Cooking Your Frozen Mozzarella Sticks to Perfection
Getting that perfect, crispy-on-the-outside, gooey-on-the-inside mozzarella stick from your air fryer isn't rocket science, but there are a few tricks I've learned that make a huge difference. It's all about managing heat and airflow to get that flawless golden crust without a cheesy explosion.
First things first, always preheat your air fryer. Don't skip this. Set it to 380°F (193°C) and let it run for about three minutes. That initial blast of hot air hits the frozen breading and immediately starts crisping it up, forming a seal that helps keep the cheese where it belongs.
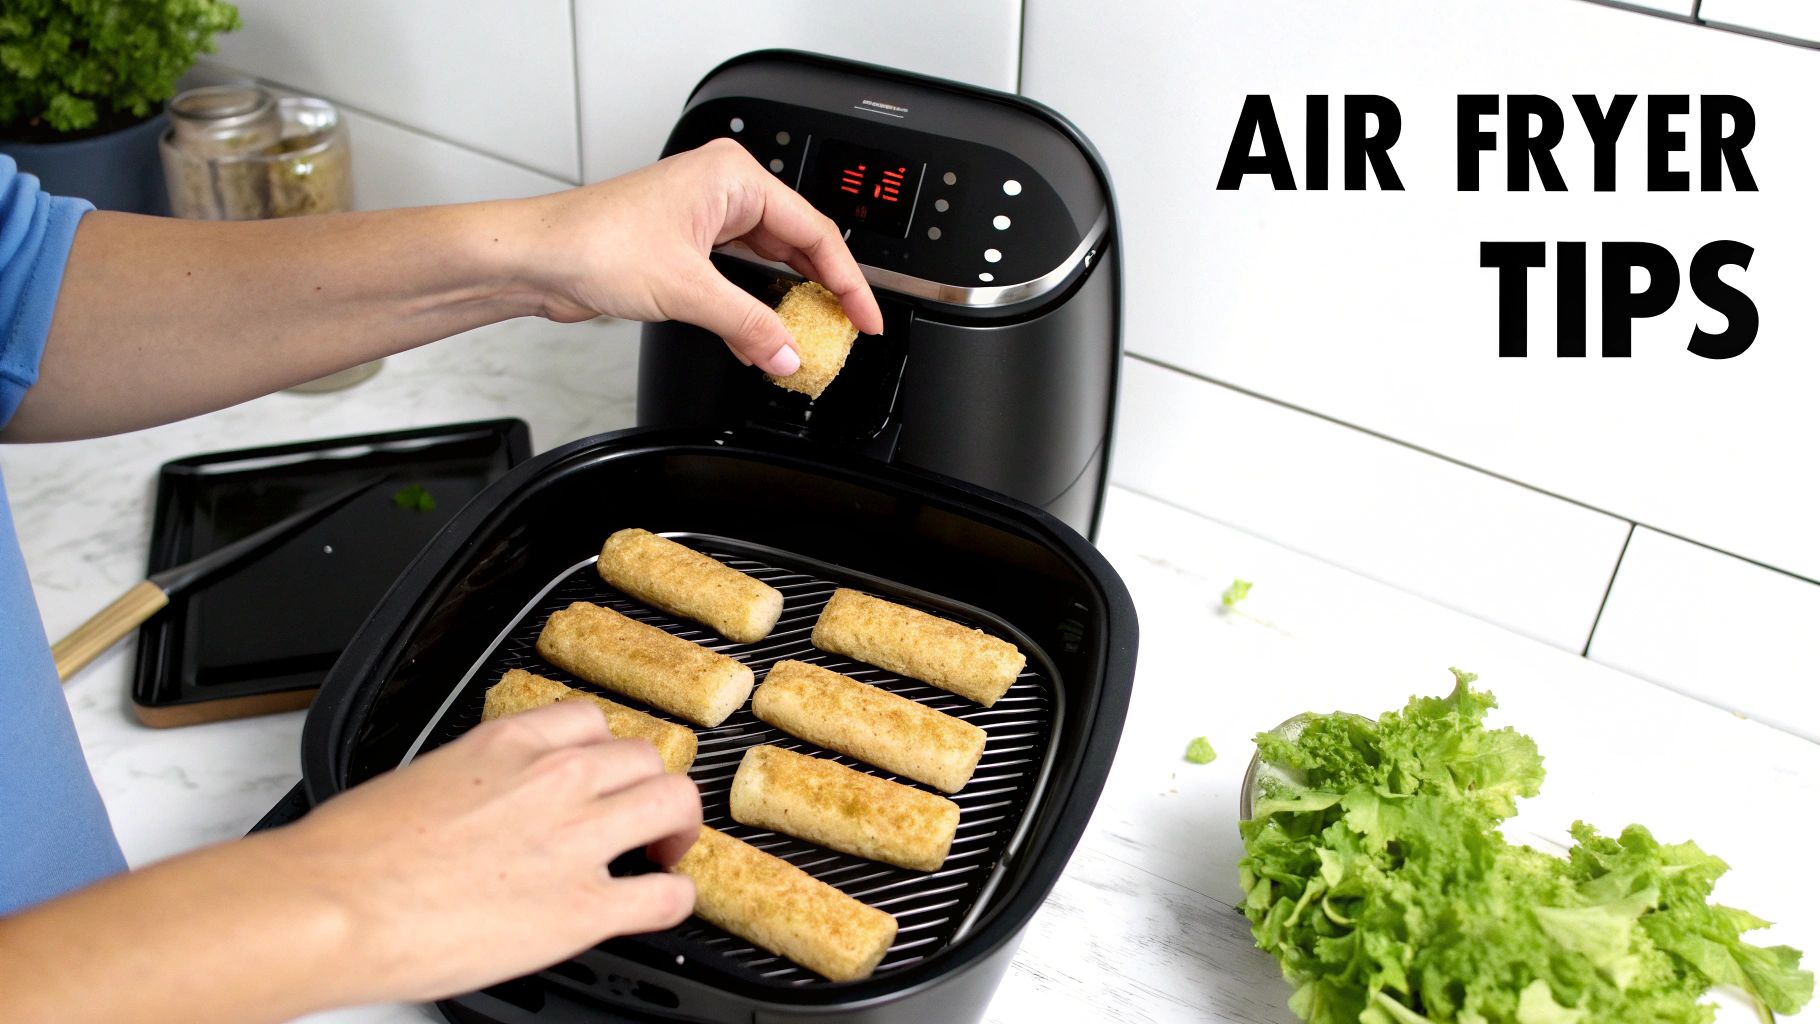
How to Load the Basket for Maximum Crunch
Once it's hot, how you place the sticks in the basket is critical. A crowded basket is the number one cause of soggy, sad mozzarella sticks because it traps steam. You're aiming for crispy, not steamed.
- Give Them Space: Place the frozen sticks in a single layer. Make sure none of them are touching. Think of it like social distancing for your snacks—that little bit of space lets the hot air swirl around every surface.
- Never Stack: I know it's tempting to cram them all in when you're hungry, but please don't stack them. If you've got a big crowd, it's much better to cook in two smaller batches. You'll get a far superior result.
- Consider a Rack: If your air fryer came with a metal rack, this is a great time to use it. Elevating the sticks guarantees hot air gets underneath, giving you that all-over crunch without even needing to flip.
A good starting point for cook time is 6 to 8 minutes. But remember, not all mozzarella sticks are created equal. Different brands have different thicknesses and breadings. I once cooked five different brands back-to-back and found the cook time varied by a good 30 seconds between the skinniest and the chunkiest ones.
Treat your first time with any new brand as a trial run. Start peeking at the 5-minute mark. You're looking for that beautiful light golden-brown color and listening for a gentle sizzle. This is how you catch them right before they overcook.
The Mid-Cook Shake and Final Touches
At the halfway point, around 4 minutes, pull the basket out and give it a good shake. This simple move is key to ensuring every side gets that even, golden-brown tan.
Want an even deeper crunch? A light spritz of cooking oil can work wonders. Most frozen brands are already coated, but a little extra from a non-aerosol spray bottle can really make the color pop. And a quick word of warning: stay away from aerosol sprays like PAM. The propellants can build up and ruin the non-stick coating of your basket over time.
If you enjoy mastering quick snacks, you'll probably appreciate the simple techniques in our guide for making a bagel in an air fryer too
Prevent Cheese Leakage in Air Fryer
Let’s be honest, there's nothing more tragic than pulling out your air fryer basket to find a cheesy crime scene. That glorious, gooey mozzarella is meant to be inside the crispy breading, not welded to the bottom of your basket. The good news? Preventing those dreaded blowouts is totally doable with a couple of pro tricks.
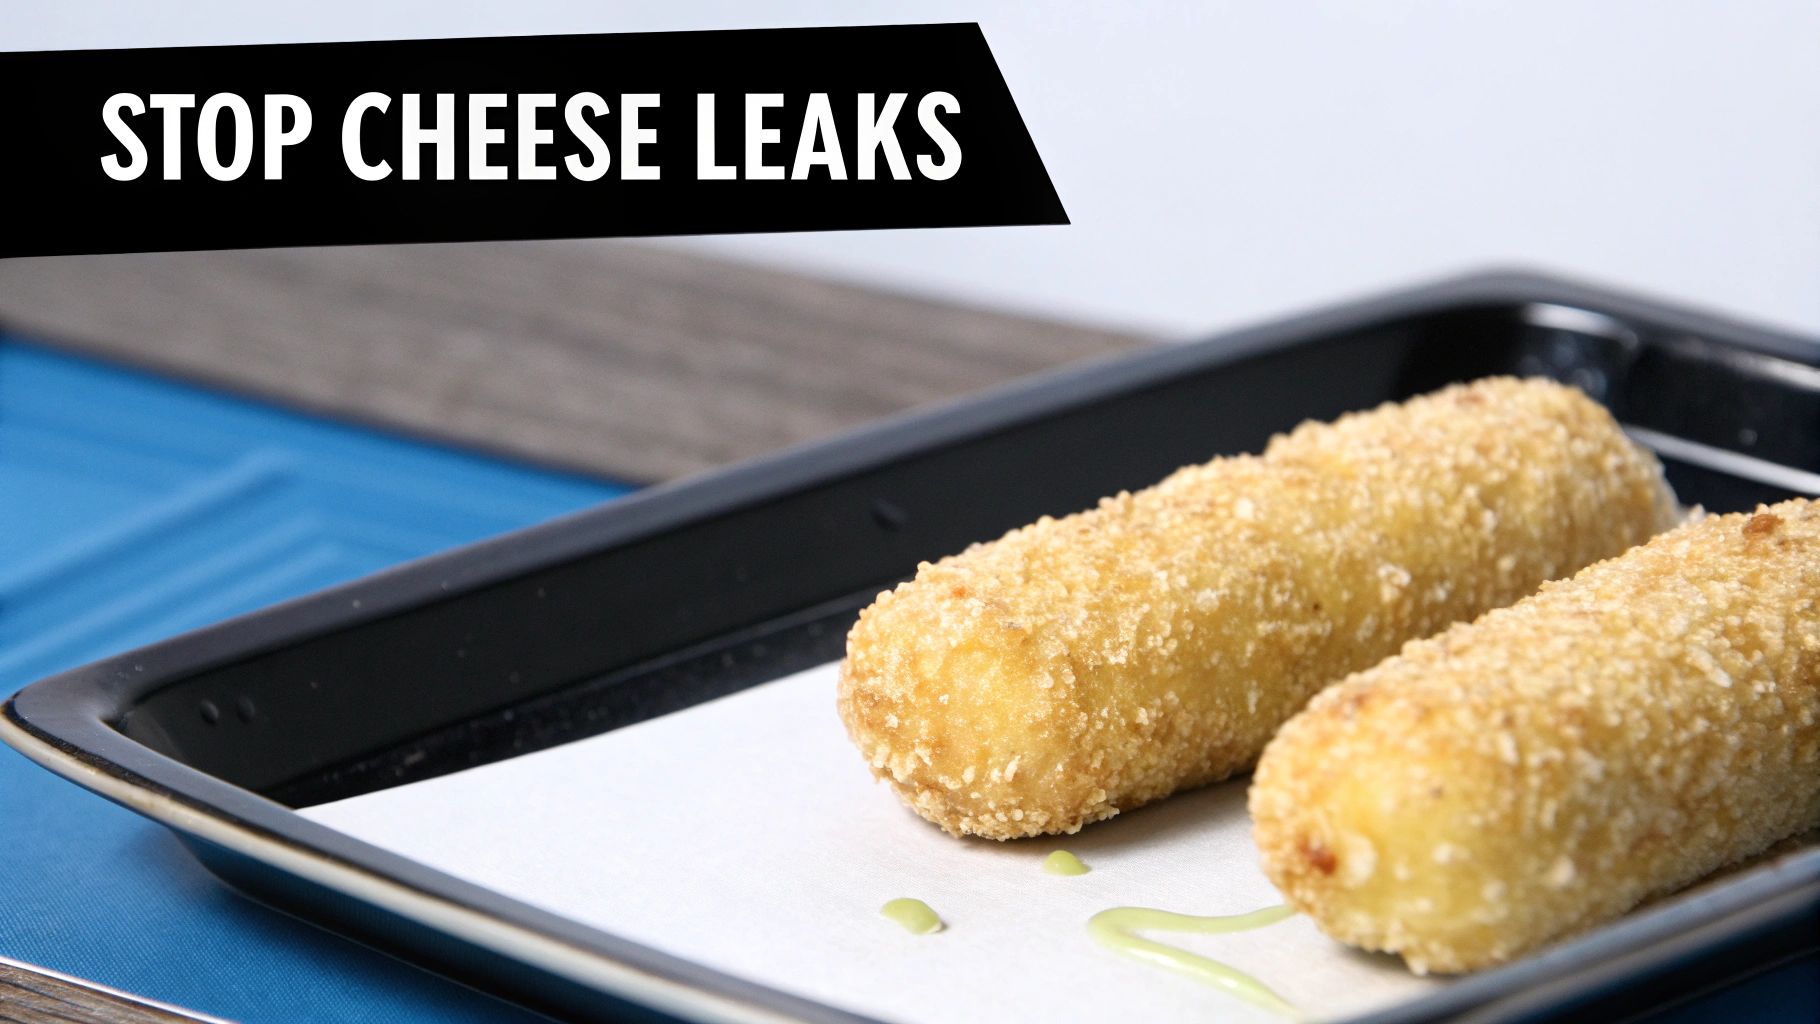
The whole problem comes down to a race against time. The breading needs to get golden and crispy before the cheese inside gets hot enough to turn into lava and burst out. If the cheese wins that race, it's game over. Our job is to give the breading a serious head start.
The Double-Freeze Trick
My absolute go-to method for perfect, leak-free mozzarella sticks is what I call the "double-freeze." It sounds fancy, but it couldn't be simpler and it works like a charm.
Before you even think about preheating that air fryer, grab the mozzarella sticks from the bag. Lay them out in a single layer on a small plate or sheet pan.
Now, slide that plate back into the freezer for an extra 15 to 30 minutes. This little step gets the cheese core rock-solid, buying the breading precious time to crisp up perfectly under the air fryer's heat. It's a tiny bit of prep that makes a huge difference.
Pro Tip: Don't go overboard and freeze them for an hour. If they get too cold, you'll have to cook them longer, which circles back to the original problem of potentially burning the outside while waiting for the inside to cook. It's all about finding that sweet spot.
Strategic Selection and Placement
Believe it or not, the brand of mozzarella stick you buy and how you place it in the basket matters. A lot. Some frozen sticks are just built better than others and are less likely to burst under pressure.
Here's what I've learned from my own trial-and-error:
- Check the Breading: Always go for sticks with a thick, solid coating. If you can see cheese peeking through thin or patchy spots before you even cook them, that’s a guaranteed blowout waiting to happen. The thicker, panko-crusted "restaurant style" sticks are usually a safer bet.
- Size Matters: In my experience, the chunkier, fatter mozzarella sticks hold up way better. Those super-skinny ones tend to explode because the small amount of cheese inside melts almost instantly.
- Arrange with a Plan: Always place your sticks in a single layer, leaving a bit of space between them. A reusable silicone liner or a small piece of parchment paper is your best friend here. If a small leak does spring, the mess is contained on the liner, not caked onto your fryer basket.
By using the double-freeze trick and being a little picky about your sticks, you stack the deck in your favor. This approach turns making frozen mozzarella sticks in the air fryer from a frustrating guessing game into a consistently delicious win every single time.
Picking the Perfect Frozen Mozzarella Stick
Let’s be honest, staring into the frozen food aisle can feel a bit overwhelming. But getting that perfect, gooey cheese pull starts right here. Choosing the right brand is your first, and most important, step to avoiding a cheesy disaster in your air fryer.
Not all frozen mozzarella sticks are built the same. Some are just destined to explode under the intense, circulating heat of an air fryer, leaving you with a hollow, breaded shell and a puddle of sadness. You're looking for a stick that's tough enough to handle the heat.
What to Look For on the Box (and in the Bag)
You’ll see a lot of boxes with an "air fryer-ready" logo these days. While that's a decent clue, it’s not a golden ticket. I've found that some brands just slap that label on their old recipe. The real secret is in the construction—the breading and the cheese.
The best defense against a blowout is a thick, sturdy breading. Think of it as armor for the cheese.
- The Breading: Go for a coarse, panko-style breading. It creates a much stronger barrier than those fine, floury coatings. This is what gives you that satisfying crunch and, more importantly, keeps the cheese where it belongs. If you can, peek through the bag—if the sticks look patchy or thinly coated, put them back.
- The Cheese: Part-skim mozzarella is your best bet. It has less moisture, which means it melts more slowly and holds its shape better. Full-fat mozzarella gets watery fast, and that steam is what causes those dreaded leaks.
- The Size: Thicker, restaurant-style sticks almost always outperform the skinny ones. The cheese in thinner sticks melts way too quickly, often before the breading has a chance to crisp up and form a seal.
This isn't just a niche preference; it's a huge market trend. The global frozen mozzarella sticks market hit $2.1 billion in 2024, and a massive chunk of that—about $1.1 billion—is now for air fryer-specific versions. It's clear how much our cooking habits have shifted. You can dig into the numbers yourself and see the full frozen mozzarella stick market's growth.
Do You Really Get What You Pay For?
So, does a higher price mean a better, leak-proof stick? In my experience, it usually does. I've pitted the budget brands against the premium, "gourmet" options, and the thicker, restaurant-style sticks win pretty much every time. They might cost an extra dollar or two, but it’s worth it to avoid the cleanup.
My Two Cents: I always spend a little extra on the thicker-cut sticks with a heavy panko coating. It saves me the headache of a cheesy mess and delivers that perfectly crunchy, gooey snack I was craving in the first place.
Ultimately, it comes down to being a smart shopper. Read the ingredients, check out the breading, and don't shy away from investing in a better quality product. It’s the difference between snack-time bliss and a frustrating mess.
Create Perfect Dipping Sauces
Sure, a perfectly crispy, golden-brown mozzarella stick is great on its own. But let's be honest—the dip is what makes it a truly crave-worthy snack. While a jar of marinara is the classic go-to, your air-fried sticks deserve a partner that really makes them sing.
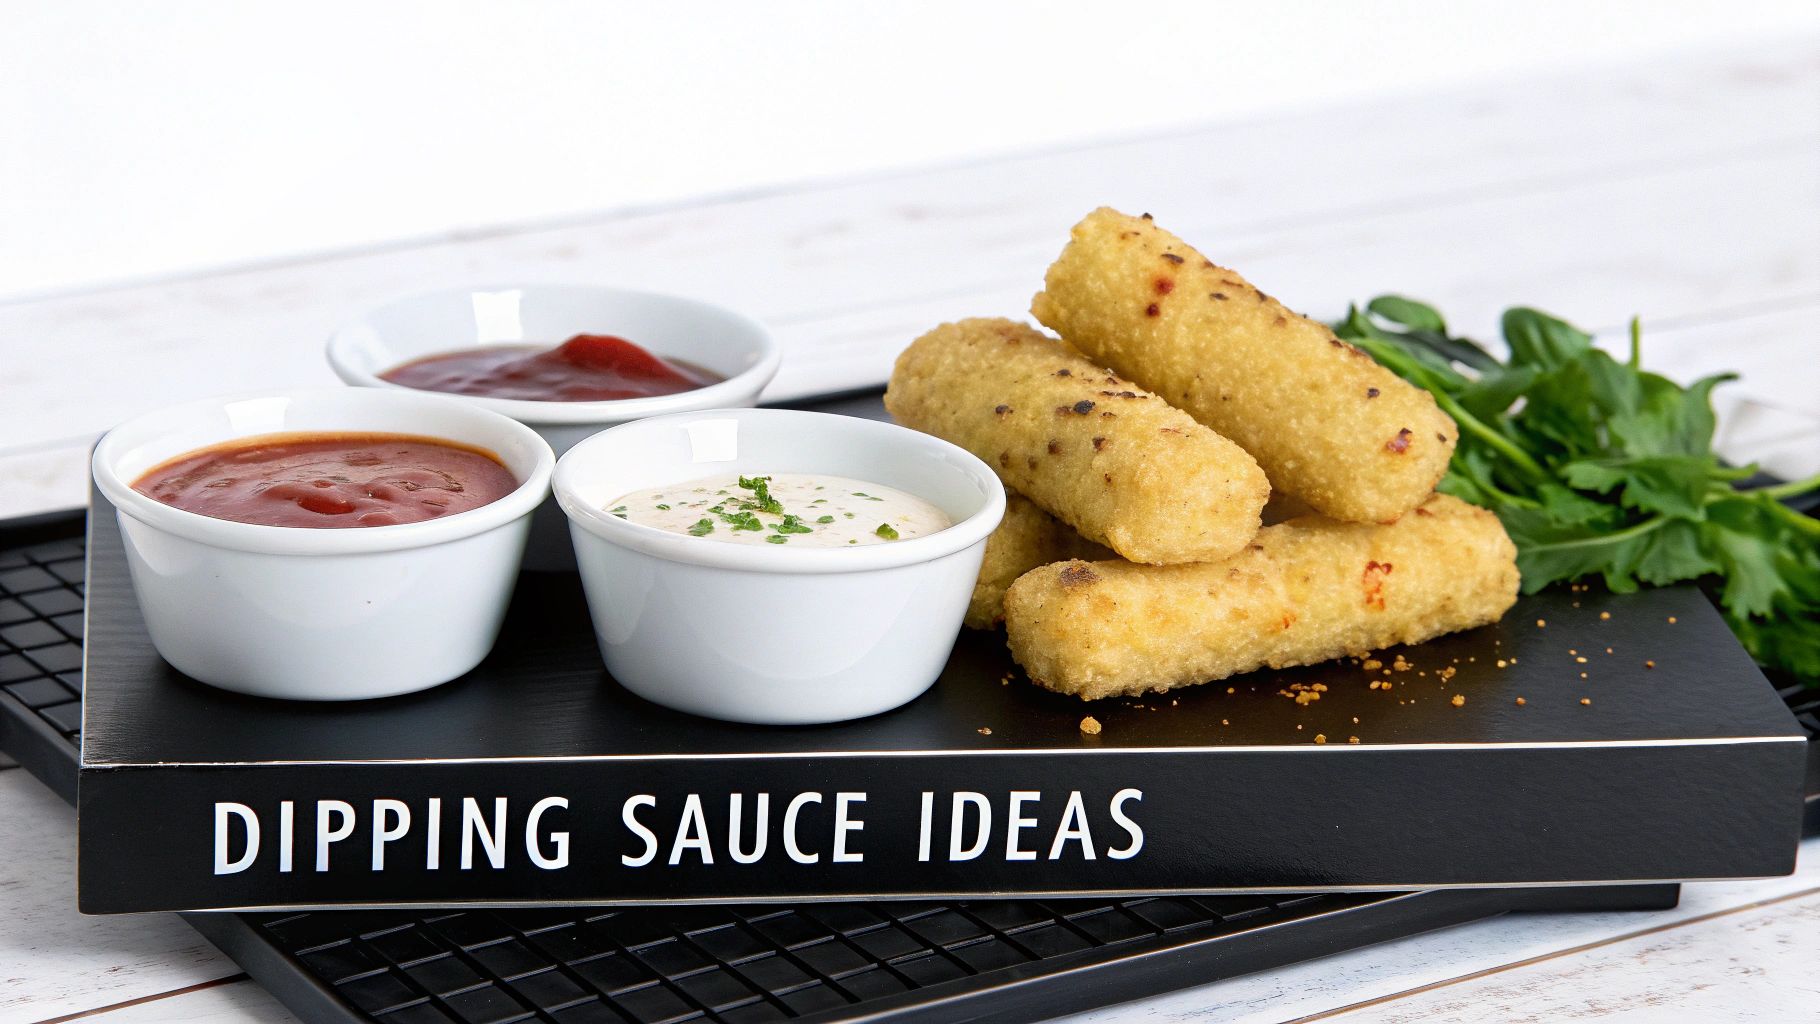
You can seriously level up your dipping game in less than five minutes with just a few pantry staples. Forget the boring jarred stuff! These are a couple of my personal favorites that have become legendary at game nights and family gatherings.
For the Spice Lovers: Fiery Arrabbiata
If you like a little heat, a quick arrabbiata sauce is a game-changer. "Arrabbiata" means "angry" in Italian, and this sauce brings just the right amount of kick to cut through the rich, gooey cheese. It’s a fantastic contrast.
You don’t need much to pull this off:
- A can of crushed tomatoes for the base.
- Some finely minced garlic.
- Red pepper flakes—this is where the "angry" comes from, so add as much or as little as you like!
- A little drizzle of chili oil to add a deeper, more complex heat.
Just stir everything together in a bowl, and it's ready. If you prefer a smoother sauce, a quick pulse with an immersion blender does the trick.
My Personal Touch: I always add a pinch of smoked paprika to my arrabbiata. It doesn’t add much extra heat, but that subtle smokiness gives the sauce a much more complex, layered flavor. It's my secret weapon.
The Crowd-Pleasing Creamy Options
Sometimes, what you really need is a cool, creamy dip to balance out the hot, crispy mozzarella stick. Both of these are total crowd-pleasers and, believe it or not, they come together in just a couple of minutes.
Herby Buttermilk Ranch
Step away from the bottled stuff! A quick homemade ranch is so much fresher and lighter. All you have to do is whisk together some buttermilk, a spoonful of mayonnaise or Greek yogurt, and a handful of fresh herbs. My go-to combo is dill, chives, and parsley. Finish it with a squeeze of lemon juice to brighten everything up.
Zesty Garlic Aioli
This one sounds fancy, but it’s ridiculously easy. Just start with a good-quality mayo. Mince a clove of garlic as finely as you can and whisk it in, along with the zest and juice of half a lemon. That pop of citrus cuts right through the richness and makes the whole snack feel a little more gourmet.
Dipping Sauce Inspiration
Trying to decide which dip is right for the occasion? This little cheat sheet breaks down some great pairings to help you choose the perfect partner for your mozzarella sticks.
| Sauce Type | Flavor Profile | Best For |
|---|---|---|
| Classic Marinara | Tangy, Herby, Familiar | Traditionalists and kids' parties |
| Fiery Arrabbiata | Spicy, Garlicky, Robust | Those who like a kick of heat |
| Buttermilk Ranch | Cool, Creamy, Herbaceous | Cooling down the spice and pleasing a crowd |
| Garlic Aioli | Rich, Zesty, Pungent | Creating a more elevated, bistro-style snack |
| Raspberry Chipotle | Sweet, Smoky, Spicy | An unexpected and adventurous flavor pairing |
Pairing your perfectly cooked sticks with a homemade dip is that final touch that takes them from good to great. Whether you go for something spicy, creamy, or sweet, that little bit of extra effort is something your friends and family will definitely notice and appreciate.
Saving Your Leftover Mozzarella Sticks for Later
Let's be real, sometimes your eyes are bigger than your stomach. You air fry a perfect batch of golden mozzarella sticks, and a few glorious, cheesy soldiers are left behind. Don't you dare throw them out! Leftovers don't have to be a soggy, sad disappointment.
The key to reviving them is all about how you store them. First things first: let them cool down completely. If you seal them up while they're still warm, you're just trapping steam, which is the number one enemy of crispy breading.
Storing Cooked Mozzarella Sticks the Right Way
Once your sticks are at room temperature, it's time to tuck them away properly. Just covering a plate with plastic wrap is a recipe for a mushy mess. You need to protect that delicate, crunchy coating.
- Your Best Bet: An airtight container is ideal. Arrange the cooled sticks in a single layer to give them space. If you have to stack them, just slide a small piece of parchment paper between the layers. This little trick prevents them from sticking together and getting damp.
- In a Pinch: A zip-top bag will also work. Lay the sticks inside, squeeze out as much air as you can before you seal it, and then lay the bag flat in your fridge.
Using one of these methods, your mozzarella sticks will stay in great shape for up to three days in the refrigerator. After that, the breading starts to lose its magic.
How to Reheat for That Perfect Crunch
When you're ready for another round of cheesy goodness, promise me you'll stay far, far away from the microwave. It's the fastest way to turn a crispy, delicious snack into a rubbery, chewy tragedy. Your air fryer, the hero that cooked them to perfection in the first place, is also the hero that can bring them back to life.
My Pro Tip: The secret to reheating is to go a little cooler and quicker. You're not cooking them from scratch this time; you're just waking them up. Too much heat will scorch the breading before the cheese inside even knows what's happening.
To perfectly revive your leftover mozzarella sticks, preheat your air fryer to a slightly lower temperature of 350°F (177°C).
Place the sticks back in the basket, making sure they're in a single layer with a bit of breathing room. Pop them in for just 2 to 4 minutes. That’s it! It’s just enough time to get the outside crispy again and melt the cheese back to that signature gooey pull. They’ll taste so good, you might forget they're leftovers.
Got Questions About Air Fryer Mozzarella Sticks?
Even with a recipe this simple, a few questions always pop up. Getting the little details right is what separates a perfectly gooey, crispy mozzarella stick from a frustrating, cheesy mess. Let's dig into the most common things people ask.
The biggest one I hear is about thawing. Should you let them sit out first? The answer is a hard no. Absolutely not. You have to cook them from a fully frozen state. If you let them thaw, the breading gets soft and the cheese melts way too fast, leading to those dreaded cheese explosions all over your air fryer basket.
What About Homemade Mozzarella Sticks?
Yes, you can absolutely make your own, and they are fantastic! The trick is to freeze them completely solid after you bread them. I don't just mean chilling them for a bit—they need a good 1-2 hours in the freezer to get rock solid.
This step is non-negotiable. It helps the coating set up into a strong barrier that can actually contain the cheese as it melts. Once they’re frozen solid, you can use the same temperature and time I recommend for the store-bought kind. Just be sure to keep a close eye on them, as your specific breading and cheese might cook a little differently.
My Pro Tip: Whether you're using store-bought or homemade sticks, the golden rule is always start from frozen. For extra insurance against leaks, I'll even toss the store-bought sticks back into the freezer for 15 minutes before I air fry them.
Do I Need to Spray Them With Oil?
For most frozen brands you find at the store, you don't need to add any oil. The breading on those usually has enough oil mixed in to get perfectly crispy and golden all on its own.
That being said, if you’re after that extra-deep color and an even crunchier bite, a little spritz of oil can definitely help.
- Use a Mister: A light coating from an oil mister works best. I use a neutral oil like canola or avocado.
- Avoid Aerosol Sprays: Stay away from aerosol cooking sprays like PAM. Over time, the propellants in those cans can build up on your air fryer basket and start to damage the non-stick coating.
It's a small tweak that can upgrade the texture, but honestly, it’s more of a finishing touch than a must-do step for great results.
For more delicious and simple snack ideas, check out the recipes at airfryersnackideas.com. You can find your next favorite treat right here.