
Getting your air fryer conversion right is way easier than it seems. The golden rule I always start with is this: drop the oven temperature by 25°F (around 15°C) and then slice about 20% off the original cooking time. This simple formula is your best friend and the perfect starting point for turning just about any oven recipe into an air-fried masterpiece.
Mastering Your First Air Fryer Conversion
We’ve all been there—staring at a favorite oven recipe, wondering how to make it work in the air fryer. The trick isn't about complicated math; it's about understanding what makes your air fryer tick.
Think of it as a tiny, super-charged convection oven. Its small cooking basket and powerful fan blast hot air all around your food, cooking it much faster and more intensely than a regular oven ever could. That's the secret behind that amazing crispy finish everyone craves.
But that high-speed cooking is exactly why you can't just copy the oven instructions. If you did, you'd end up with a burnt, tragic mess on the outside and a raw, sad middle. A successful air fryer conversion is all about taming that intense heat to get everything perfectly cooked.
The Foundational Principles
Before we get into specific foods, let's lock down the basics. These rules are your foundation, whether you’re whipping up roasted veggies, crispy chicken wings, or just heating up some frozen fries. Get these down, and you'll feel confident tackling any recipe.
You'll always be tweaking two main things:
- Temperature Reduction: Dialing back the heat is crucial. It stops that powerful fan from charring the surface of your food before the inside gets a chance to cook.
- Time Reduction: With all that concentrated heat, food just cooks faster. Period. Make a habit of checking for doneness much earlier than you think you need to.
The biggest rookie mistake is using the oven instructions directly. Your air fryer is a completely different beast and needs its own playbook.
Here's a quick cheat sheet to keep these rules handy.
Quick Air Fryer Conversion Cheat Sheet
This table breaks down the essential starting points for converting your favorite recipes. Think of it as your go-to reference before you start cooking.
| Original Cooking Method | Temperature Adjustment | Time Adjustment | Key Tip |
|---|---|---|---|
| Conventional Oven | Reduce by 25°F (15°C) | Reduce by 20%–25% | Always preheat for best results. |
| Convection Oven | No change or reduce by 10°F | Reduce by 20% | Convection ovens are similar, but air fryers are faster. |
| Deep Fryer | Match temperature | Varies widely; check often | Use minimal oil and shake the basket frequently. |
| Stovetop (Pan-Frying) | Match temp; start around 375°F | Reduce significantly | Don't overcrowd the basket to ensure crispiness. |
Remember, these are guidelines. You'll fine-tune things as you get to know your specific air fryer model.
Why This Appliance Is Everywhere
The explosion in air fryer popularity has made recipe conversion a must-have skill for anyone who loves to cook. This isn't just some fad; the global air fryer market has rocketed from around $1.0–$1.4 billion in the mid-2020s and is projected to keep climbing.
North America is a huge part of this trend, with so many of us looking for healthier ways to cook. But places like the Asia-Pacific region are catching on fast, showing massive growth. This boom means more and more people are searching for solid advice. If you're looking for inspiration, you can find a ton of ideas in our air fryer blog section. You can dig deeper into the numbers behind this growth in this detailed market analysis.
The Go-To Formula for Time and Temperature
So, you're ready to convert your favorite oven recipes for the air fryer. It can feel like a bit of a guessing game at first, but there's a surprisingly simple rule of thumb that will get you about 90% of the way there. Think of it as your foundational recipe for success.
Here's the secret sauce: reduce the oven temperature by 25°F (around 15°C) and cut the cooking time by 20%. It’s not magic; it’s just a smart adjustment for how these powerful little machines work. An air fryer's small space and high-powered fan create an intense, super-convection environment that cooks food much faster than your big, traditional oven.
Let’s put it into practice. Say you have a recipe for roasted chicken thighs that says to cook them for 30 minutes at 400°F in the oven.
- New Temperature: 400°F – 25°F = 375°F in the air fryer.
- New Time: A 20% reduction from 30 minutes is 6 minutes. So, 30 – 6 = 24 minutes.
This quick calculation is your best friend. It’s the key to avoiding the most common air fryer mistake: a burnt, sad exterior with a raw, disappointing middle.
Why Your Air Fryer Has Its Own Personality
Now, that 25°F / 20% rule is a fantastic starting point, but it's not the absolute final word. Every air fryer is a little different. The wattage, the basket size, even the design—it all affects how aggressively it cooks. A powerful, compact model is going to cook a lot faster than a larger, lower-wattage air fryer oven.
It's kind of like driving a car. A high-performance sports car is going to get up to speed much quicker than a minivan, even if you press the gas pedal the same way. Your air fryer's wattage is its engine.
A Pro Tip From My Kitchen: The quickest way to learn your machine's quirks is to take it for a test drive. Grab a bag of frozen french fries or chicken nuggets—something with air fryer instructions on the package. Cook them exactly as directed and see what happens. This gives you a personal baseline. If your fries are perfectly golden five minutes early, you'll know your machine runs hot and you should lean closer to a 25% time reduction for future recipes.
Once you know if your model generally runs hot or a bit slow, you can tweak the formula on the fly and get perfect results every time.
The "Why" Behind the Math
Understanding why you're making these changes is what separates a good cook from a great one. It all comes down to heat transfer. An air fryer blasts food with concentrated hot air in a tiny space, a process called high-speed convection. This is wildly more efficient than the gentle radiant heat of a big oven.
This is exactly why you can't just use oven settings and hope for the best. Failing to adjust usually leads to that classic new-user frustration: burnt on the outside, undercooked on the inside. Most manufacturers and cooking experts agree, recommending a temperature drop of 25–45°F and a time reduction of 20–30% for consistent success. If you're curious about the appliance trends, you can dig into the details in this industry report.
This technical difference also explains why a flexible, percentage-based rule is so much more useful than a rigid one. A recipe that just says "cook for 15 minutes" might work for the author's specific air fryer, but it could be a disaster in yours. A guideline like "reduce time by 20%" empowers you to get it right, no matter what machine you're using.
How to Convert Different Types of Food
Those general rules for air fryer conversion? They're a fantastic starting point, but they don't tell the whole story. Let's be real—converting recipes isn't a one-size-fits-all game. A delicate salmon fillet needs a completely different touch than a batch of hearty potato wedges.
If you really want to master your air fryer, you have to learn how to adapt your approach based on what you’re cooking. Think of this as your practical playbook for the most common food categories, so you can get it right every time.
This flowchart gives you a great visual of the core adjustments you'll be making when you move a recipe from the oven to the air fryer.

As you can see, it all starts with reducing both the temperature and the time. Nail those two things, and you're already most of the way there.
Handling Frozen Foods
Frozen foods like fries, onion rings, and chicken nuggets are what air fryers were born to do. That circulating hot air is brilliant at zapping away ice crystals, leaving you with an unbelievably crispy finish. Honestly, these are the easiest things to convert.
For most packaged frozen goods, you can just use the same temperature listed on the bag for an oven. The only real change is the time—you’ll need a lot less of it.
- Real-World Example: A bag of frozen sweet potato fries says to bake at 425°F for 20 minutes. In my air fryer, I'd knock that down to 400°F and start checking for crispiness around the 12-15 minute mark.
- My Golden Rule: Don't forget to shake the basket! A vigorous shake about halfway through is non-negotiable. It’s the only way to make sure every single fry gets that perfect golden-brown crunch.
Perfecting Roasted Vegetables
Getting that perfect char on broccoli florets or tender-crisp asparagus is an art. Your goal is to roast them, not steam them into a soggy mess. The secret is managing moisture and giving the hot air plenty of room to work its magic.
First, always give your veggies a light toss in oil. This is what helps them brown beautifully and keeps them from just drying out. Then, make sure you arrange them in a single, even layer. If you have to work in batches, do it. It’s worth it.
My personal rule for veggies is to check them early and often. I've learned the hard way that five extra minutes can be the difference between perfectly roasted and sadly burnt, especially with delicate stuff like green beans or bell peppers.
For tougher vegetables like potatoes or carrots, you can stick pretty close to the standard "drop it 25°F, cut time by 20%" formula. But for veggies with a lot of water, like zucchini or mushrooms, I sometimes bump the heat up a bit to evaporate that moisture quickly and stop them from getting mushy.
Cooking Proteins with Confidence
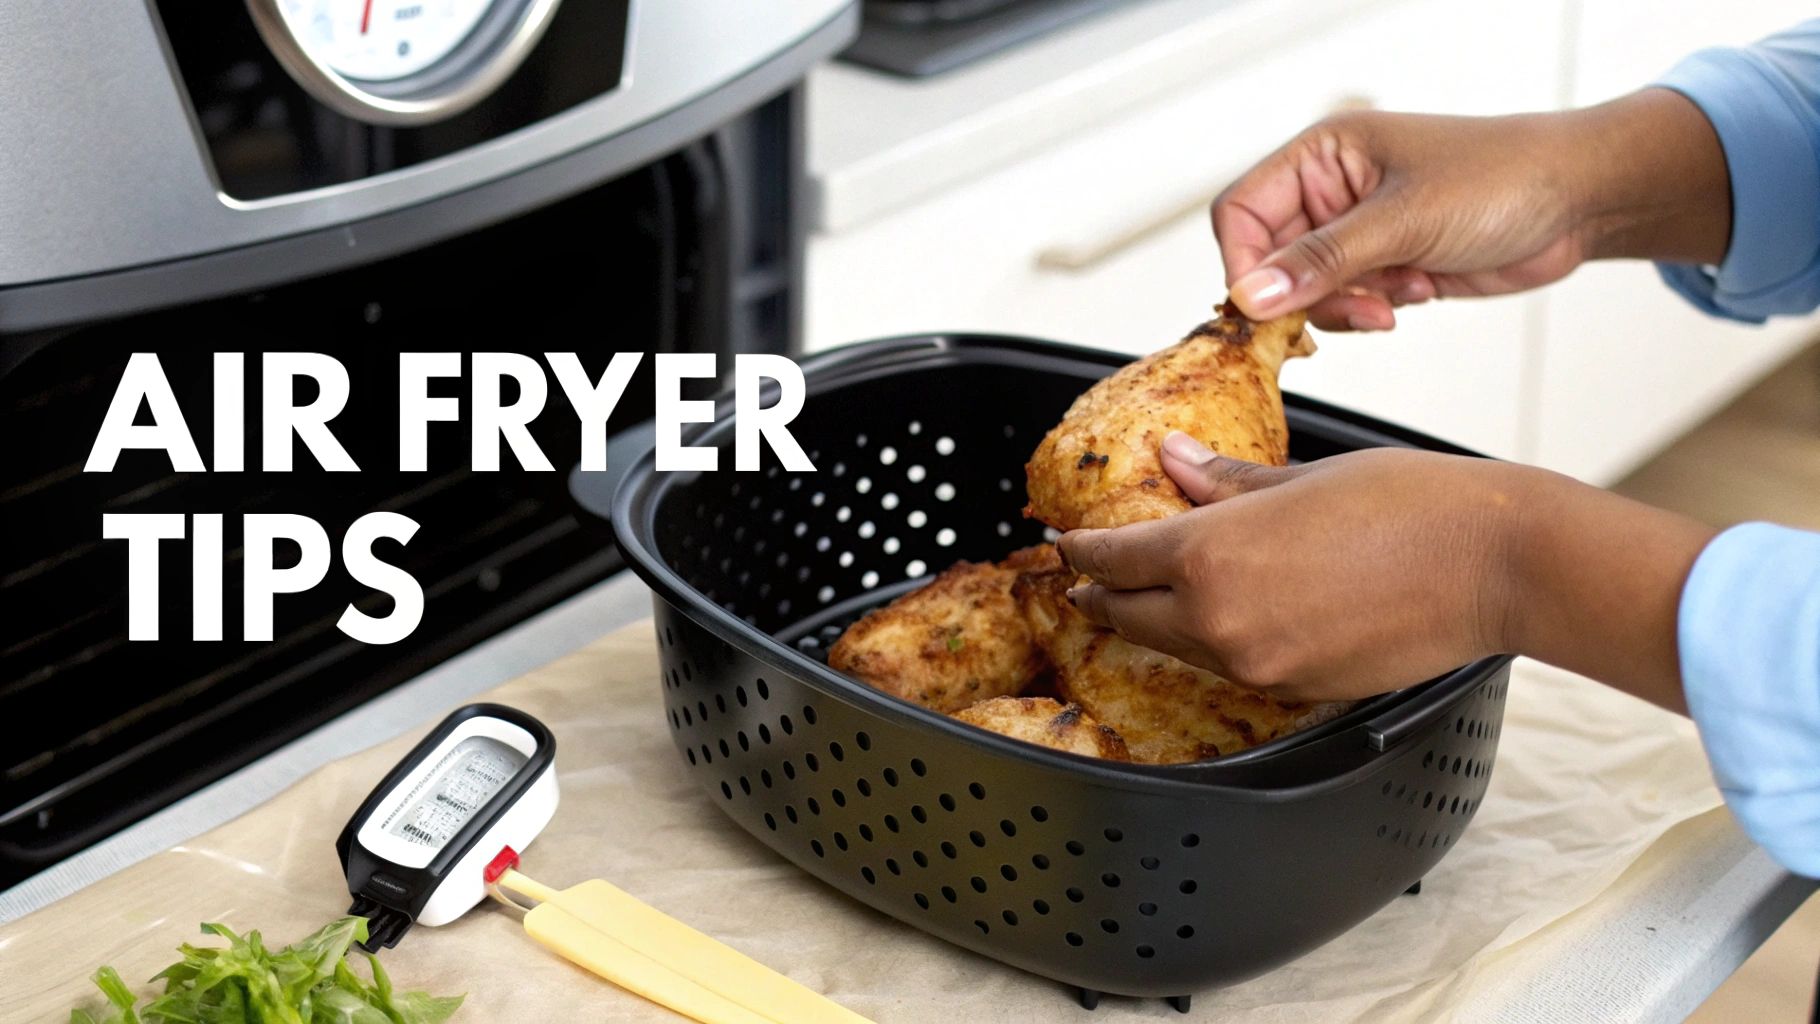
When you’re cooking proteins like chicken breasts, pork chops, or salmon, the biggest fear is ending up with something dry and tough. The air fryer’s intense heat can be unforgiving, which is why your single most important tool here is a good digital meat thermometer.
Seriously, you can't just eyeball it. The outside of a chicken thigh can look perfectly golden-brown long before the inside is safe to eat. A thermometer takes all the guesswork out of the equation.
Here are the target temperatures you should be aiming for:
- Chicken and Turkey: 165°F (74°C)
- Pork Chops: 145°F (63°C)
- Fish Fillets: 145°F (63°C)
Always stick the probe into the thickest part of the meat without hitting a bone. This simple step is the key to juicy, perfectly cooked protein every single time.
Navigating the World of Baked Goods
Okay, I’ll admit it: baked goods are probably the trickiest thing to get right in an air fryer. That powerful top-down fan can scorch the tops of your muffins or small cakes way before the center has a chance to set.
This is where you need to be a little more aggressive with your temperature drop. Instead of just reducing the heat by 25°F, I often find I need to lower it by as much as 50°F. This gentler heat gives the inside time to cook through evenly.
Here's another trick I rely on: a small piece of foil. If you see the tops browning too quickly, just loosely tent a bit of aluminum foil over them for the rest of the cooking time. It acts as a shield, letting the rest of your baked good finish cooking perfectly. It’s a simple move, but it's a total game-changer.
Essential Techniques for Perfect Results
Getting the time and temperature right is the core of any good air fryer conversion. But once you’ve got the numbers dialed in, a few simple habits are what separate decent results from that perfectly crispy, golden-brown food you’re aiming for.
Don't Crowd the Basket
This is the golden rule of air frying. It’s so tempting to pile everything in at once to save time, but that’s the fastest way to get soggy, unevenly cooked food. An air fryer is basically a small, high-powered convection oven—it works by blasting hot air around your food. If that air can't hit every surface, you're not air frying; you're steaming.
For that signature crunch, always arrange your food in a single, even layer. If you're making a big batch of fries or wings, it's much better to cook them in two batches than to cram them all in. A little breathing room is the secret ingredient for maximum crispiness.
Give Your Air Fryer a Head Start
I know a lot of models claim you don't need to preheat, but trust me on this one. A quick 3-5 minute preheat makes a huge difference. It means your food goes into a properly hot environment from the very start.
That initial blast of heat helps sear the outside of meats, makes breaded coatings extra crispy, and just leads to more predictable, even cooking. You wouldn't put a cake into a cold oven, right? The same logic applies here if you want the best possible texture.
The All-Important Shake and Flip
Because the main heat source is at the top of the air fryer, you absolutely have to move the food around. Forgetting this step is why people end up with food that's burnt on top but pale and sad on the bottom.
Here’s my approach for different foods:
- Small, Loose Items: For things like french fries, tater tots, or chopped veggies, pause the cooking halfway through and give the basket a really good shake. This tosses everything around, exposing new surfaces to the direct heat.
- Larger, Solid Items: With chicken thighs, salmon fillets, or burgers, you’ll need to open the drawer and use tongs to physically flip each piece over. This is non-negotiable for getting both sides beautifully browned.
Don’t stress about hitting the exact halfway point. Just set a timer for roughly half the cook time to remind yourself. This one small action will have the biggest impact on your results, I promise.
This hands-on approach is what makes an air fryer conversion truly successful. It ensures that powerful, circulating air can work its magic on every single inch of your food.
Common Conversion Mistakes and How to Fix Them
Even with the right techniques, things can sometimes go sideways when you're converting a recipe. It's all part of the learning process! I've run into every issue imaginable, and here are the most common problems I see and, more importantly, how to fix them.
| Problem (e.g., Food is Burnt Outside, Raw Inside) | Likely Cause | Solution |
|---|---|---|
| Burnt Outside, Raw Inside | Temperature is too high. The outside cooks and burns before the inside has a chance to catch up. | Reduce the temperature by 25°F (about 15°C) and slightly increase the cooking time. Check for doneness with a thermometer. |
| Soggy or Steamed Food | Overcrowding the basket. Air can't circulate to crisp up the food's exterior. | Cook in smaller batches, ensuring food is in a single layer with space between pieces. You'll get much crispier results. |
| Unevenly Cooked Food | Lack of agitation. The food that stayed on top got all the heat, while the bottom layer was shielded. | Shake the basket or flip the food halfway through the cooking time. This is essential for almost every recipe. |
| Dry or Tough Food | Cooked for too long or at a temperature that was still too high. This is common with lean meats like chicken breast. | Reduce the total cook time. Start checking for doneness 3-5 minutes before the estimated time is up. Use a meat thermometer! |
| White, Floury Patches on Breaded Items | Not enough oil. The dry flour spots didn't have any fat to help them brown and crisp up. | Lightly spray the food with cooking oil before air frying. A quick spritz is all you need to get a golden, even coating. |
Think of this table as your troubleshooting guide. By understanding why a problem is happening, you can easily adjust and nail the recipe the next time.
Why Mastering These Skills Matters
Air fryers aren't just a fad; they've fundamentally changed how millions of people cook. The appliance has seen a massive surge in popularity, with global production expected to hit over 113 million units annually by 2029. This boom is driven by people wanting healthier and faster ways to get dinner on the table.
As more home cooks switch from their conventional ovens, knowing these simple but crucial techniques is the key to unlocking everything this awesome appliance can do. If you're interested in the data behind this trend, you can learn more about these consumer trends in this market report.
Working with Baked Goods and Wet Batters
After you’ve mastered converting recipes for things like chicken wings or fries, you start to feel pretty confident. But then you try a cake, or something with a wet batter, and everything changes. That powerful, circulating air that makes food so crispy can quickly become your worst enemy, blowing batter all over the place or leaving you with a burnt top and a raw middle.
Don't sweat it. You absolutely can adapt these trickier recipes for the air fryer, and it opens up a whole new world of things you can make. It just requires a different mindset than you'd use for your standard veggies or proteins.
The Challenge of Baking in an Air Fryer
So, can you bake in an air fryer? Yes, but you have to actively protect your food from that intense, top-down heat. The fan is notorious for scorching the surface of a muffin or brownie long before the center gets a chance to cook through.
First, you’ll need an oven-safe pan that fits comfortably in your air fryer basket. Leave a little space around the edges for that all-important air circulation. I use small cake pans, silicone muffin cups, or even ramekins.
The biggest change here is the temperature. While the standard rule is to drop the oven temp by about 25°F, for baked goods, you need to be more aggressive. I typically reduce it by 40-50°F. This gentler heat gives the inside a fighting chance to cook at the same rate as the outside.
Here's my go-to trick for avoiding a burnt top: a small piece of aluminum foil. If you peek in and see the surface browning way too fast, just loosely tent a piece of foil over the pan for the rest of the cook time. It acts as a perfect little shield.
How to Handle Wet Batters and Sticky Sauces
If you've ever watched a thin, tempura-style batter fly right off your food and splatter against the heating element, you know the struggle. The high-speed fan is simply too much for it. The solution isn't to give up, but to change your coating strategy entirely.
Forget thin batters. Instead, you want to embrace the classic "dry-wet-dry" breading method. It creates a much sturdier crust that crisps up beautifully without making a mess.
It’s a simple, three-step process:
- First Dry Coat: Dredge your food (chicken tenders, shrimp, whatever you're making) in seasoned flour. This gives the wet layer something to grab onto.
- Wet Coat: Dip the floured piece into an egg wash—just a beaten egg with a splash of milk or water.
- Final Dry Coat: Press the food firmly into panko, breadcrumbs, or even crushed cornflakes until it’s completely covered.
This method basically builds a little "jacket" for your food that stays put, giving you that incredible crunch you're looking for.
And what about sugary, sticky sauces like barbecue or teriyaki? The high sugar content means they will burn and smoke if you add them too early. Instead, cook the food plain first. Then, brush on your sauce during the last 2-3 minutes of cooking. That's just enough time for it to heat up and caramelize perfectly without turning into a burnt, smoky disaster.
Let's Bake Some Brownies
Let's walk through a real-world example. Say you have a killer brownie recipe that bakes in an 8×8 pan at 350°F for 30 minutes.
First, you'd grab a smaller, air-fryer-safe pan. Then, it's time to adjust the settings:
- New Temperature: Drop it by 50°F, taking it down to 300°F.
- New Time: Reduce the time by about 20%, which means starting with 24 minutes.
Pour your batter into the greased pan, pop it in the preheated air fryer, and start checking for doneness with a toothpick around the 20-minute mark. This same logic works for all sorts of baked goods, from small quick breads to savory dishes. You can even adapt yeast-based recipes; take a look at our guide on making bagels in an air fryer to see just how versatile this machine can be. Once you get the hang of it, you'll be amazed at what you can create.
Answering Your Top Air Fryer Conversion Questions
Even when you've got the basic formula down, a few questions always seem to pop up. Converting recipes isn't an exact science, and sometimes you just hit a snag. Let's walk through some of the most common questions I get asked, from beginners and seasoned pros alike.
Think of this as your go-to troubleshooting guide. Getting comfortable with these common situations is how you really build confidence and start getting creative with your air fryer.
Do I Really Need to Preheat My Air Fryer?
Yes, almost always. I know it's tempting to skip, but think about it: you wouldn't slide a pan of cookies into a cold oven, right? The same logic applies here. Preheating for just 3-5 minutes gets the cooking chamber up to temperature, which is the key to even cooking and that perfectly crispy exterior we're all after.
This step is non-negotiable for things with breaded coatings or baked goods like biscuits. That initial blast of high heat is what sets the texture. The only time I might skip it is when I'm just reheating leftovers, but for actual cooking, make preheating a habit.
How Do I Convert a Convection Oven Recipe?
Good news! This is the simplest conversion you'll ever do. An air fryer is really just a small, super-charged convection oven. Since they both use a fan to circulate hot air, the core principles are nearly identical.
For the most part, you can stick with the exact same temperature called for in the convection recipe. The only thing you'll need to tweak is the time. Because the air fryer’s chamber is so much smaller and the airflow is more intense, things cook faster. A solid rule of thumb is to reduce the cooking time by about 20%. And, as always, start checking on your food a few minutes early.
The main takeaway here? The temperature is likely fine, but you'll almost always need less time. That concentrated airflow in the air fryer is what makes all the difference.
Is It Safe to Use Aluminum Foil or Parchment Paper?
Absolutely, but you have to do it correctly. There's one golden rule you can't forget: the foil or parchment paper must be weighed down by food.
If you put a loose liner in the basket, the fan can whip it up into the heating element, creating a serious fire hazard. This is also why you should never preheat your air fryer with an empty liner inside. When using parchment, I highly recommend getting the perforated liners made for air fryers. The holes allow air to circulate underneath the food, ensuring everything still gets crispy.
Why Is My Food Cooking So Unevenly?
I can almost guarantee this is one of two things: you've either overcrowded the basket or you forgot to shake or flip the food. That powerful fan blows hot air from the top down, so if your food is piled up, the stuff at the bottom will just steam instead of crisping.
- The Overcrowding Fix: Cook in a single, even layer. Leave a little bit of space between each piece so the air can hit every surface. It's always better to cook in two small batches than one giant, crowded one.
- The Shaking/Flipping Fix: For small items like french fries, tater tots, or chopped veggies, you have to pause halfway through cooking and give the basket a really good shake. For larger things like chicken thighs or pork chops, you'll want to use tongs to flip them over.
Mastering these two simple habits will solve most uneven cooking issues. Once you have the basics down, a whole world of recipes opens up, and you can find tons of inspiration from all the amazing air fryer snack ideas out there.