
So, you want to make chips in an air fryer? It's deceptively simple. All you really need to do is slice your veggies thin, give them a quick toss with a little oil and your favorite seasonings, and let the air fryer work its magic until they're golden and crunchy.
The two things you absolutely have to get right are uniform thickness and good airflow. Nail those, and you're guaranteed a satisfying crunch every single time.
The Secret to Perfectly Crispy Air Fryer Chips
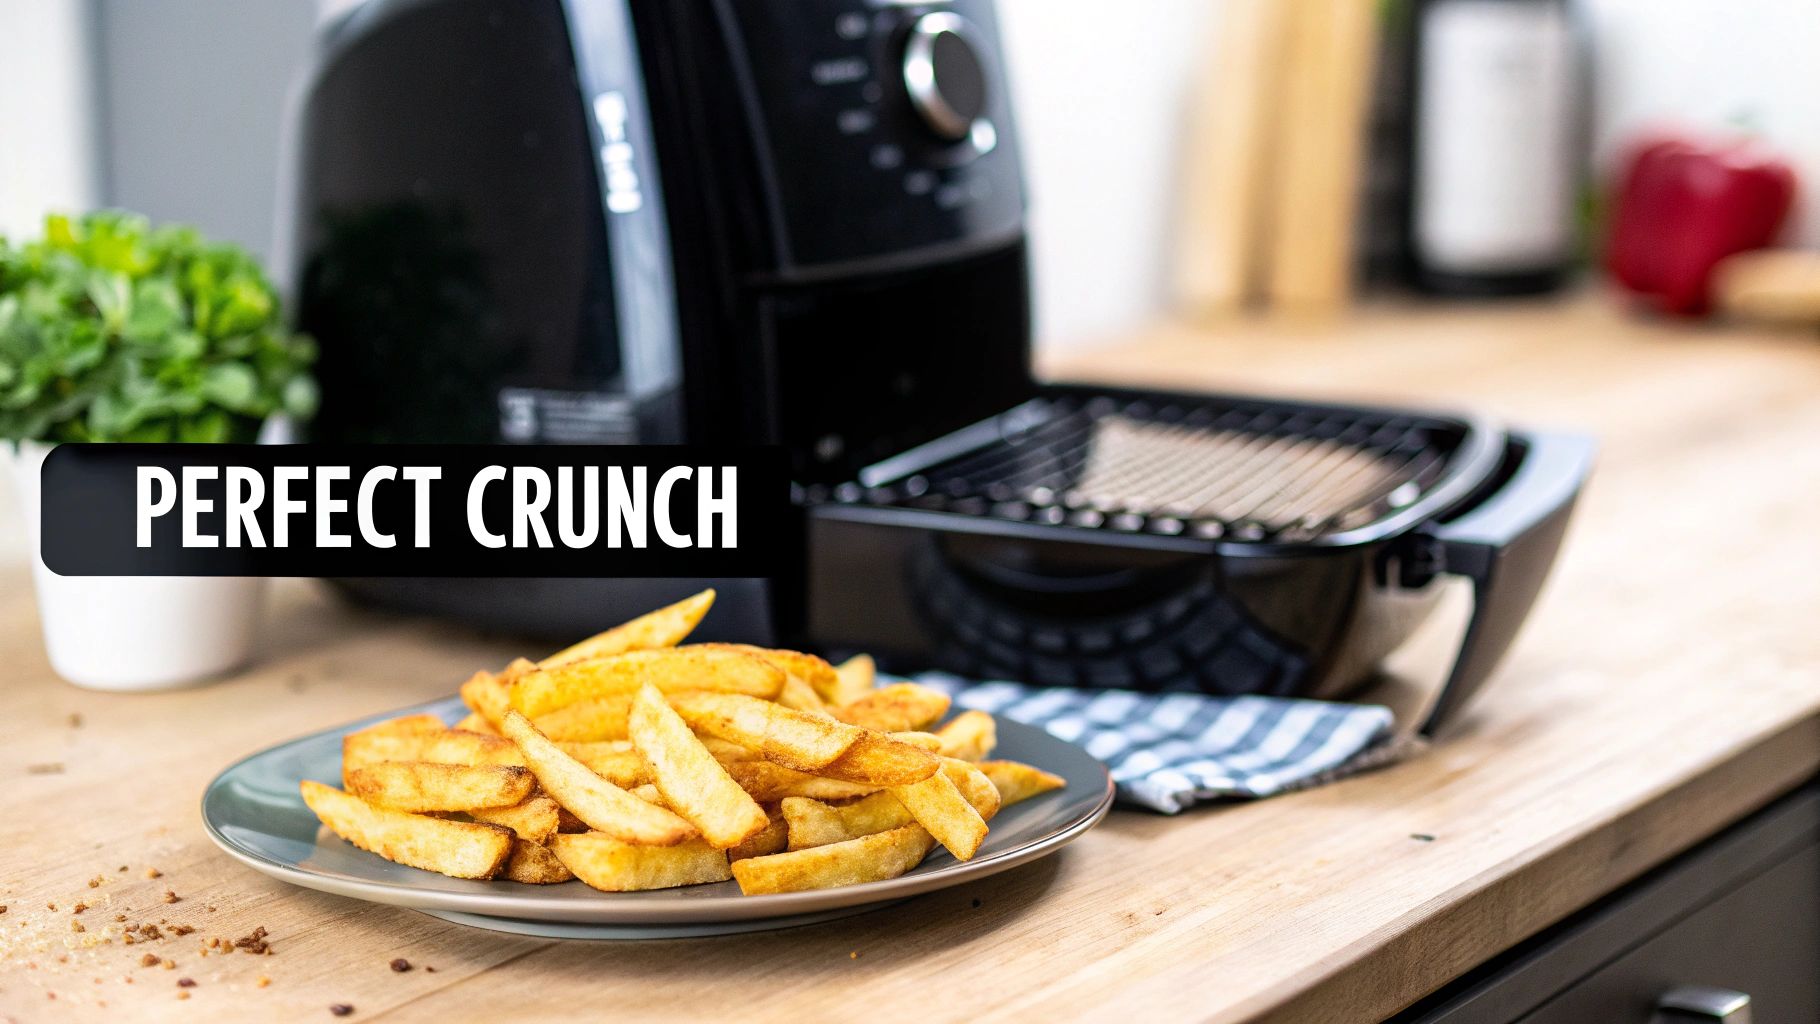
If you've ever tried baking chips only to end up with a soggy, disappointing mess, or you're just tired of the greasy aftermath of deep frying, the air fryer is about to become your best friend. It’s the key to that irresistible, shatteringly crisp chip texture you're after, and you can get it right in your own kitchen.
What's the trick? It all comes down to the appliance's core function: rapid air circulation. Think of an air fryer as a small, super-powered convection oven. It blasts hot air all around the food, quickly wicking moisture away from the surface of each chip. This is what creates that perfectly dehydrated, crunchy exterior using just a tiny bit of oil.
Why Air Frying Is the Superior Method
This method takes humble vegetables—from classic Russet potatoes to earthy beets and sweet potatoes—and turns them into a genuinely satisfying snack without the guilt. It’s a game-changer for anyone looking for a healthier alternative to the stuff you buy in a bag.
It’s this desire for healthier snacks that has helped the air fryer market explode, hitting a value of USD 8.07 billion in 2024. Experts even project it will climb to USD 17.71 billion by 2032, fueled by people who want snacks with up to 80% less fat than deep-fried versions. For more on this trend, check out the analysis from Fortune Business Insights.
With an air fryer, you're getting a few key advantages:
- Unbeatable Crunch: That constant flow of hot air creates a level of crispness that’s just tough to replicate any other way.
- Healthier Snacking: You get that deep-fried texture with just a light spritz or drizzle of oil.
- Speed and Convenience: Most batches are done in under 20 minutes, which is perfect for satisfying a sudden craving.
- Endless Variety: Don't stop at potatoes! You can experiment with a whole range of vegetables. We've got plenty of other amazing air fryer snack ideas to get you started.
The single most important rule for crispy chips is to avoid overcrowding the basket. Give your chips space to breathe, and the hot air will do the rest of the work for you. Cook in batches if you must—it’s always worth the wait!
For those who love a quick reference, here's a simple table breaking down the process for classic potato chips.
Quick Guide to Crispy Air Fryer Chips
This chart simplifies the core steps, giving you an at-a-glance guide to achieving that perfect crunch.
| Step | Action | Key Tip |
|---|---|---|
| Preparation | Wash, dry, and thinly slice potatoes (1/16-inch thick). | A mandoline slicer ensures perfectly uniform slices. |
| Soaking | Soak slices in cold water for 30 minutes, then rinse. | This removes excess starch, which is crucial for crispiness. |
| Drying | Dry the slices completely with a paper towel or salad spinner. | Moisture is the enemy of crunch! Get them as dry as possible. |
| Seasoning | Toss with 1-2 tsp of oil and your favorite seasonings. | A light, even coat is all you need. |
| Cooking | Air fry in a single layer at 350°F (175°C) for 15-20 mins. | Shake the basket halfway through for even cooking. |
Following these steps will set you on the right path, but remember that every air fryer is a bit different. Your first batch is a learning experience, so don't be afraid to adjust as you go.
Choosing the Right Veggies for Your Chips
A classic potato chip is hard to beat, but your air fryer can turn a whole host of other vegetables into wonderfully crispy snacks. The trick isn't magic; it comes down to two simple things: starch and moisture. Getting the balance right is the secret that separates a perfectly crunchy chip from a sad, soggy one.
When you're talking potatoes, some are definitely better than others for this job. I always reach for high-starch potatoes like Russets or Idahos. They're the go-to for a reason—their low moisture content and floury texture produce that light, airy, and unmistakably crisp chip we all crave.
You can use waxy potatoes like red potatoes or Yukon Golds. They have more moisture and tend to hold their shape, which isn't a bad thing. Just know that you'll get a denser chip with a firmer bite, not that delicate, shatter-in-your-mouth crispiness.
Going Beyond the Basic Potato
This is where the real fun starts. Experimenting with different vegetables opens up a whole new world of flavors and textures, though each one needs a slightly different touch to get it perfect. Here are a few of my favorites that have proven to be winners in the air fryer.
- Sweet Potatoes: Absolutely delicious, but they can be a little finicky. Their high sugar content means they'll caramelize beautifully, but they can also burn in an instant. Slice them super thin and uniform, and don't take your eyes off them for the last few minutes of cooking.
- Beets: Red or golden beets make stunning, earthy chips with a deep, slightly sweet flavor. They're naturally dense, which helps them stand up to the heat and deliver a really satisfying, sturdy crunch.
- Zucchini: Zucchini is mostly water, so it needs a bit of extra prep. After you slice it, I always toss the slices with a little salt and let them sit for 10 minutes or so. This pulls out a ton of moisture. Just be sure to pat them bone dry before they go into the air fryer.
If there's one thing I've learned after making countless batches of chips, it's this: moisture is the enemy of crisp. It doesn't matter if you're using potatoes, kale, or beets—the drier your slices are going in, the crunchier they'll be coming out.
A Quick Guide to the Best Veggies for Frying
To help you figure out where you want to begin, here’s a quick rundown of the most popular choices. I've broken down what makes each one unique, so you can pick the right veggie for the exact flavor and texture you're after.
| Vegetable | Starch/Sugar Profile | Moisture Level | Final Texture | Pro Tip |
|---|---|---|---|---|
| Russet Potato | High Starch | Low | Light, Crispy, Fluffy | Give the slices a quick soak to wash off extra starch. |
| Sweet Potato | High Sugar | Medium | Crispy but Chewy, Sweet | Keep a close eye on them; they burn fast! |
| Beet | Low Starch, Medium Sugar | Low | Dense, Crunchy, Earthy | A mandoline is your best friend for uniform slices. |
| Zucchini | Very Low Starch | High | Delicate, Lightly Crisp | Salt and pat dry to pull out as much water as possible. |
Honestly, you can turn almost any root vegetable into a decent chip. I’ve had great success with parsnips, carrots, and even turnips. Once you get a feel for how starch and moisture work together, you can tweak your method for pretty much anything and get that perfect, crunchy snack every time.
Mastering Prep for Maximum Crunch
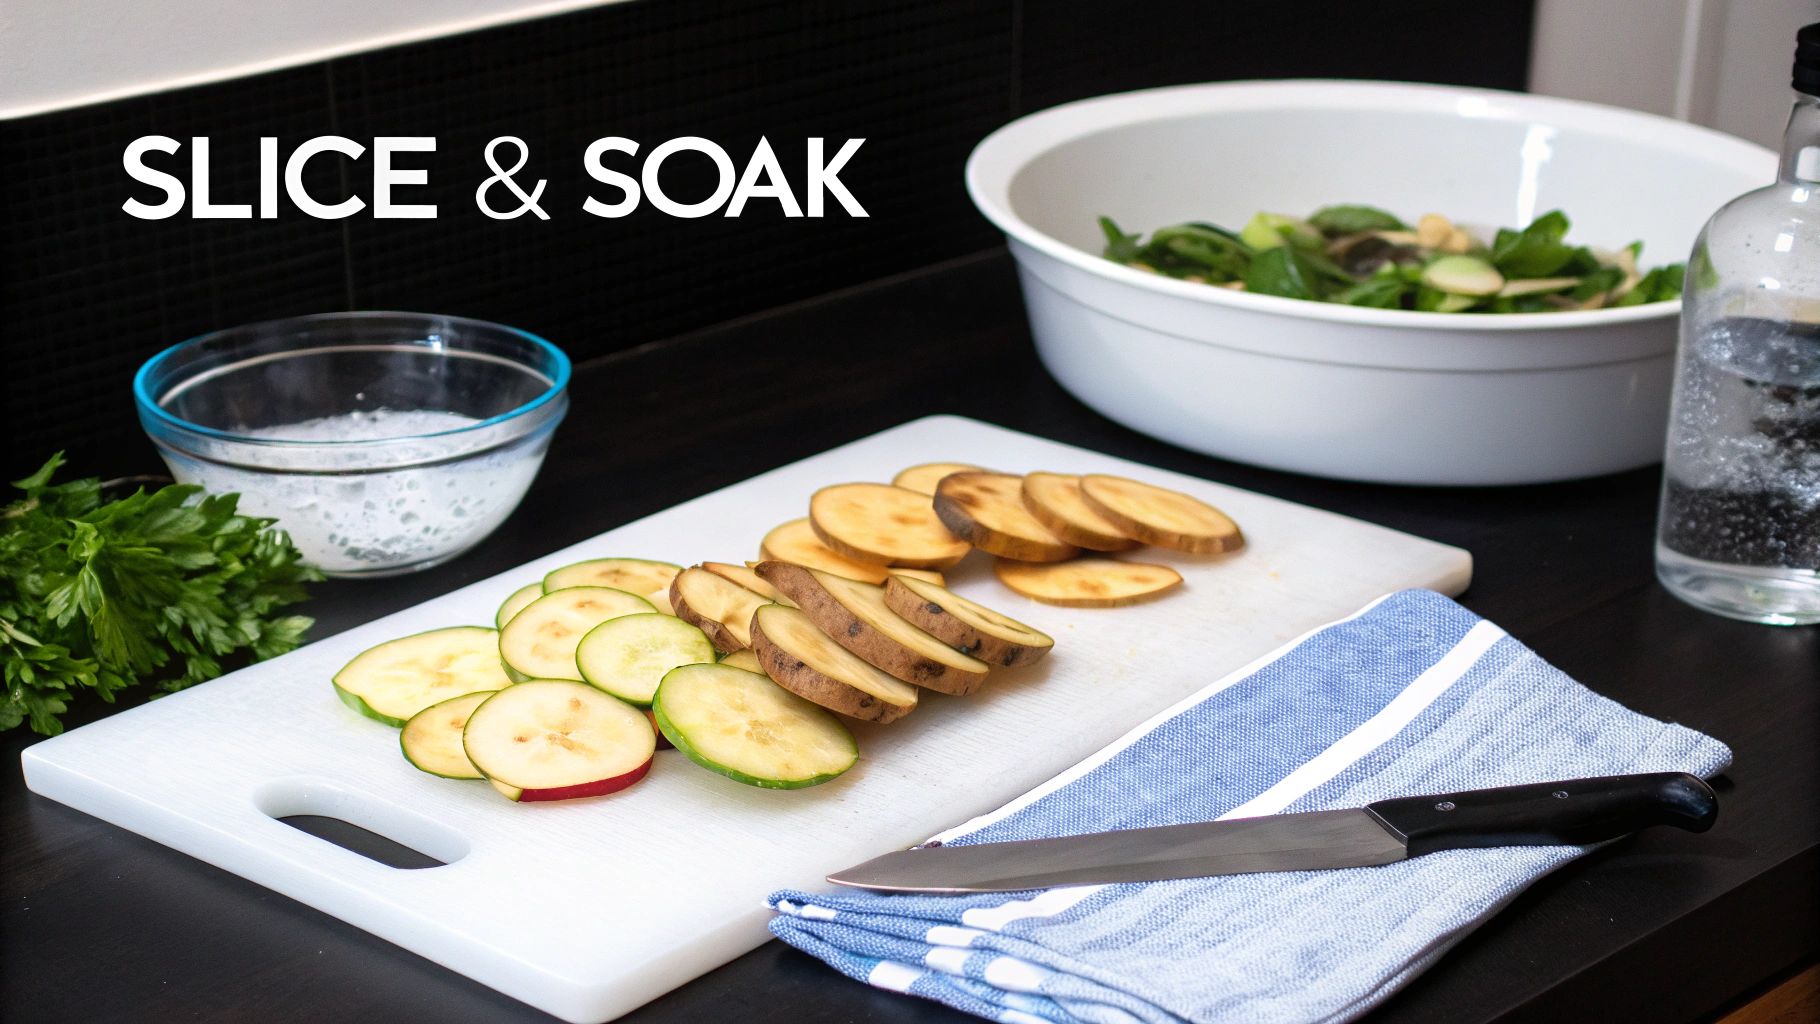
Truly great chips aren't just cooked; they're engineered right from the start. That satisfying, sharp crunch you’re after begins long before your vegetables ever feel the heat of the air fryer. The two secrets to a fantastic batch are actually quite simple: slicing and soaking.
Get these prep steps right, and you'll ensure every single chip cooks at the same rate. No more frustrating batches where some chips are golden brown, others are burnt black, and the rest are still sadly limp. This stage is what separates an okay snack from an unforgettable one.
The Mandoline: Your Secret Weapon for Consistency
For chip perfection, your slices have to be paper-thin and uniform. I can't stress this enough. Achieving that consistency with a knife is a tall order, which is why a mandoline slicer is an absolute game-changer in my kitchen. You can set a precise thickness—I aim for around 1/16th of an inch (about 2mm)—and get identical slices every single time.
Think about it: if one slice is thicker than another, it holds more water and needs more time to cook. By the time that thicker slice finally gets crisp, the thinner ones around it will be long gone, probably burnt. Uniformity isn't just for pretty pictures; it’s the key to even cooking.
Your goal is to create slices so thin you can almost see through them. This maximizes the surface area exposed to the hot air, which means a faster, crispier result with that classic light and airy texture we all love.
Why You Should Never Skip the Soak
Once you've got your potatoes sliced, the next crucial step is a cold water bath. It might seem like an extra, fussy step, but there's real science behind it. Slicing potatoes releases a fine, powdery surface starch that is the enemy of crispiness. It’s what makes chips stick together in a gummy clump.
Soaking the slices in cold water does two fantastic things:
- It washes away all that excess surface starch.
- It helps pull out some of the internal moisture from the potato itself.
Both of these things work together to guarantee a far superior crunch. This little pro tip is well-known in North America, where air fryers hold a commanding 38.9% market share. A quick 30-minute soak for russet potato slices cut to about 3mm is pretty standard for getting those perfectly golden chips in about 18 minutes. You can dive deeper into these appliance stats and consumer trends in this detailed market report.
The Final, Crucial Step: Drying
After the soak, you have to get your slices completely and utterly dry. Any water left on the surface will immediately turn into steam inside the air fryer, and steam is the mortal enemy of a crispy chip. Don't just give them a quick dab—be meticulous here.
Here are a few ways to get the job done right:
- Salad Spinner: This is my go-to. It's the fastest and most effective way to fling off most of the water.
- Paper Towels: Lay the slices out in a single layer on a few paper towels, then pat them dry from above with another one. You might need to do this a couple of times.
- Clean Kitchen Towel: A lint-free tea towel works just as well. Gently press the slices between the folds of the towel to soak up every last drop of moisture.
Only when your slices are perfectly uniform and bone-dry are they ready for the next stage of their journey. Get this right, and you're well on your way to making the best homemade chips you've ever had.
The Art of Seasoning and Flavoring Your Chips
This is where the magic really happens. You’ve nailed the slicing and the prep, but the seasoning? That's what gives your chips their soul. It’s the step that transforms a simple slice of vegetable into a snack you can’t stop reaching for. But before you grab the spice rack, let's talk about the unsung hero: oil.
You can technically make chips without any oil, but a little bit goes a very long way. Think of it as the glue that holds all the flavor together. Just one teaspoon of oil is all it takes to help the seasonings cling to every chip, and it’s the secret to getting that perfect golden-brown finish and irresistible crunch.
Choosing and Applying Your Oil
When you're working with the concentrated heat of an air fryer, not just any oil will do. You need one with a high smoke point to prevent your chips from tasting scorched. I've had the best results with these:
- Avocado Oil: This is my go-to. It has a super high smoke point (around 520°F or 271°C) and a clean, neutral taste that lets your spices shine.
- Grapeseed Oil: Another fantastic high-heat option that won’t overpower your other flavors.
- Light Olive Oil: Steer clear of extra-virgin olive oil for this job. Its smoke point is too low. A refined or "light" olive oil, however, can handle the heat much better.
The trick to application is getting an even, barely-there coating. Don't just pour the oil in—you'll end up with greasy spots and bald patches. Instead, put your dried chip slices into a big bowl, drizzle the oil over the top, and get your hands in there. Gently toss everything until each slice has a faint sheen. An oil mister or spray bottle is also a great tool for this.
Here's a pro tip that makes a huge difference: always season before you cook. When you toss the raw, oiled slices with your spice blend, the flavors have a chance to bake right into the chip itself. It creates a much deeper, more complex taste that won’t just shake off in the basket.
Go-To Flavor Combinations to Get You Started
With your chips lightly oiled, it's time to play. Plain salt is fine, but this is your chance to get creative. Once you've mixed your seasonings, sprinkle them over the chips in the bowl and toss thoroughly until every piece is coated.
Here are a few of my favorite blends that never fail:
- Smoky BBQ: A timeless classic. Mix smoked paprika, garlic powder, onion powder, a touch of chili powder, and just a pinch of brown sugar for that perfect sweet-and-savory balance.
- Garlic Parmesan: So addicting. Use finely grated Parmesan cheese, garlic powder, a little dried parsley, and fresh-cracked black pepper. It’s absolutely incredible on standard potato chips.
- Zesty Ranch: Get that cool, tangy flavor by using a packet of dry ranch seasoning. Or, make your own with dried dill, onion powder, garlic powder, and a dash of salt.
- Spicy & Earthy: This blend is a perfect match for sweet potato or beet chips. Combine cumin, chili powder, and a tiny pinch of cayenne for a warm, fragrant kick.
These are just starting points. The best part of making your own chips is creating a signature flavor that's all your own.
Getting the Air Frying Part Just Right
With your chips prepped and seasoned, we’re ready for the main event. Getting the cooking technique down is what separates a decent batch of air-fried chips from a truly spectacular one—the kind that delivers that addictive, audible crunch.
First things first, and this is a step I see people skip all the time: preheat your air fryer. It works just like a conventional oven. Starting with a hot basket means the chips begin crisping immediately instead of sitting there and steaming while the machine slowly gets up to temp.
A quick 3-minute preheat is all you need. Many of the newer digital models, which now make up 64% of the air fryer market, have a dedicated preheat button, which is super convenient. This hot start is key to getting that crispy, golden-brown finish while using very little oil—often just a single tablespoon is enough for a whole pound of potatoes, slashing calories by up to 80%.
The Golden Rule: Give Them Space
If you take away just one piece of advice from this guide, let it be this: do not overcrowd the basket. This is, without a doubt, the most common mistake I see people make. The magic of an air fryer is its ability to circulate incredibly hot air around every surface of the food. Piling chips on top of one another completely blocks that airflow.
What happens then? The chips on top might get crispy, but the ones buried underneath just get steamed and soggy. Nobody wants that.
For consistently perfect results, you have to arrange the chips in a single, even layer. It's always better to cook in two or three smaller batches than to try and cram them all in at once. Trust me, the extra time is worth it for a truly flawless batch.
This single-layer principle applies to just about everything you cook in an air fryer, from these chips to something you might not expect, like a fantastic toasted bagel. If you're curious, you can learn more about how to make a bagel in the air fryer in another one of our guides.
This simple visual guide breaks down the essential flow of seasoning your chips. Getting this right—oiling first, then seasoning, then tossing—ensures every single chip is perfectly coated for maximum flavor and crispiness.
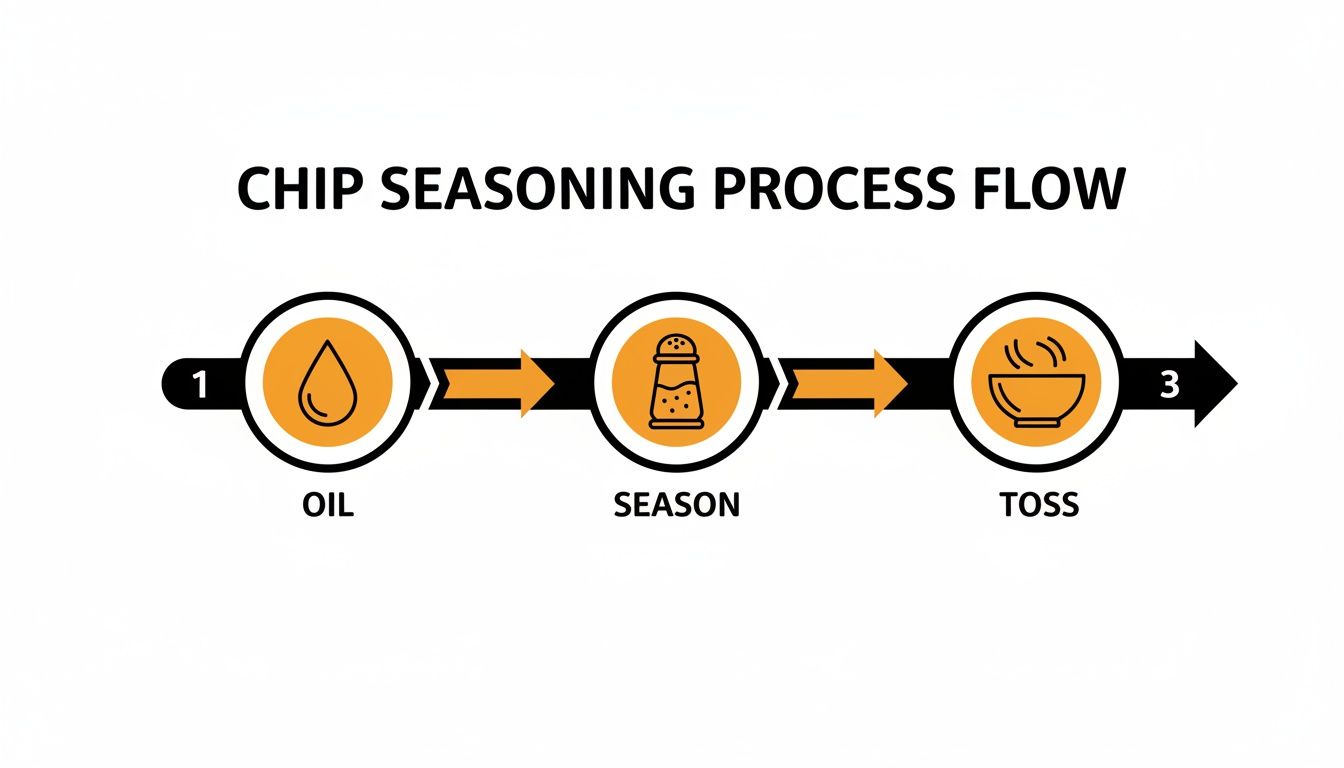
Following this three-step process is crucial. The oil acts as the perfect binder, making sure all those delicious spices stick to every slice before they hit the heat.
Timing and Temperature for Every Type of Chip
Getting the time and temperature just right can feel a little tricky since it varies based on your air fryer model and how thick you sliced your veggies. Think of the chart below as your go-to starting point. These are the settings I've personally tested and perfected for consistent results.
Air Fryer Cooking Times and Temperatures for Various Chips
| Chip Type | Slice Thickness | Temperature (°F/°C) | Total Cook Time | Instructions |
|---|---|---|---|---|
| Russet Potato | 1/16 inch (2mm) | 375°F (190°C) | 15-20 mins | Shake the basket vigorously halfway through. |
| Sweet Potato | 1/16 inch (2mm) | 360°F (182°C) | 12-15 mins | Watch closely; high sugar content can cause them to burn quickly. |
| Beet | 1/16 inch (2mm) | 375°F (190°C) | 10-12 mins | Flip or shake after 5 minutes for even crisping. |
| Zucchini | 1/8 inch (3mm) | 400°F (200°C) | 8-10 mins | Check often, as they cook very fast due to high water content. |
| Kale | N/A | 300°F (150°C) | 5-7 mins | They are delicate and can fly around; use a rack if you have one. |
Use these recommendations as a guide and don't be afraid to peek in the basket and adjust as needed.
Finally, a last crucial tip: always shake the basket halfway through cooking. It’s a simple move, but it makes a huge difference. Shaking redistributes the chips, making sure every surface gets exposed to that circulating hot air for a beautiful, even, golden-brown finish on the entire batch.
What to Do When Your Air Fryer Chips Go Wrong
It happens. You follow the recipe to a T, but you still pull out a basket of sad, floppy chips. Don't worry, we've all been there. Let's walk through the most common pitfalls and how to fix them.
The number one complaint I hear is about soggy chips. If you're missing that satisfying, sharp crunch, the villain is almost always moisture. Water is the enemy of crispiness. It creates steam inside the air fryer, and steamed veggies just don't get crispy. The fix is simple but crucial: pat your slices completely, aggressively dry with paper towels before they go anywhere near the basket.
Then there's the classic case of the uneven batch—a frustrating mix of burnt crisps, perfectly golden chips, and a few that are still stubbornly soft. This almost always comes down to one of two things.
Solving for Uneven Cooking
First, take a hard look at how you're slicing. If your slices are all different thicknesses, they simply can't cook at the same rate. This is where a mandoline slicer really becomes your best friend, guaranteeing every single slice is identical.
The other likely culprit is overcrowding the basket. It's so tempting to dump the whole batch in at once, but you have to resist! Hot air needs to hit every surface of every chip to work its magic. If they're piled on top of each other, you'll end up steaming them instead of frying them. Always cook in a single layer, even if it means running a few smaller batches. It's worth the extra time.
A little tip from my own kitchen: I used to get so frustrated with my sweet potato chips charring at the edges while the centers were still soft. I finally realized their high sugar content meant they were burning too fast. I just dropped the temperature by 15°F, gave the basket an extra shake halfway through, and it made all the difference.
And what if your seasoning just slides right off? You probably didn't use enough oil (or you skipped it entirely). That light coating of oil isn't just for crisping; it acts like a glue for your salt, paprika, or whatever else you're using. A quick toss in a tiny bit of oil ensures every chip gets its fair share of flavor. A little practice is all it takes to get it just right.
Answering Your Air Fryer Chip Questions
Even with the best instructions, a few questions always pop up when you're trying a new recipe. Let's tackle some of the most common ones I hear about making chips in the air fryer.
Why Did My Chips Come Out Soggy Instead of Crispy?
This is the number one question, and the answer almost always comes down to two culprits: moisture and overcrowding.
First off, any water left on your vegetable slices is the mortal enemy of crispiness. It creates steam inside the air fryer, and steaming is the opposite of frying. Make sure you pat every single slice completely dry with a paper towel before you even think about seasoning them.
The second issue is giving your chips enough personal space. If you pile them into the basket, the hot air can't circulate properly. The chips on the bottom end up steaming in the moisture released by the chips on top. Always cook them in a single, even layer for the best results.
Can I Really Make These Chips With No Oil?
Technically, yes, you can. But should you? Probably not if you're after that classic chip texture.
Even a tiny amount of oil—we're talking just half a teaspoon for a whole batch—works wonders. It helps the heat transfer more evenly, which is how you get that gorgeous golden-brown finish and a truly satisfying crunch. Oil also gives your salt and spices something to grab onto.
Chips made without any oil tend to be much drier and have a texture that’s more like a cracker. A light spritz from an oil mister is the perfect compromise for fantastic texture without adding a lot of fat.
Expert Tip: I can't stress this enough: getting your chips bone-dry before they hit the air fryer is the most critical step for achieving a perfect crunch. Don't skip it!
How Do I Store Homemade Chips So They Stay Fresh?
The trick to keeping them crispy is to let them cool down completely on a wire rack first. If you seal them up while they're still warm, you'll trap condensation in the container, and all your hard work will turn into a soggy mess.
Once they've reached room temperature, pop them into an airtight container or a zip-top bag. They'll be at their absolute best if you enjoy them within two to three days.
For more snack inspiration and helpful tips, feel free to browse through our other articles on the air fryer snack ideas blog.
For more simple and delicious recipes, visit airfryersnackideas.com at https://airfryersnackideas.com.