
Absolutely. You can take chicken wings straight from the freezer and have them crispy, hot, and ready to eat in about 30 minutes. The trick is using high heat and giving them enough space in the basket. The air fryer does all the hard work, taking them from frozen solid to perfectly cooked.
Why Your Air Fryer Is Perfect for Frozen Wings
Let's be honest, nobody has time to thaw chicken wings when a craving hits. That’s where the air fryer really shines. It's not just a shortcut; it's a genuinely better way to cook frozen wings, giving you that deep-fried crunch without all the oil and mess.
Think of your air fryer as a super-powered convection oven. It blasts hot air all around the food, which does a few things at once. It quickly thaws the wings, cooks the meat all the way through, and renders the fat from the skin. The result? That incredibly crispy finish we're all after.
The Science of the Crisp
Getting that perfect, crunchy skin isn't magic—it comes down to a couple of simple rules I always follow. First, you absolutely must preheat your air fryer. Dropping frozen wings into a screaming hot basket gives them a head start on crisping up. Second, don't crowd the basket. Each wing needs its own space for the hot air to work its magic.
The secret to a perfect batch of air-fried frozen wings is simple: high heat and ample space. Overcrowding the basket is the fastest way to steam your wings instead of crisping them.
People are catching on to how easy it is to make amazing snacks at home. The market for frozen, fully-cooked wings has exploded, recently hitting $679 million in sales—that's a 20% jump in just one year. And get this: products made specifically for air fryers are behind 61% of that growth. It just goes to show how many of us are using our air fryers to get restaurant-style food at home. Learn more about how consumers are recreating restaurant experiences with their air fryers.
This same "high heat, lots of space" principle works for tons of other quick snacks. If you're looking for another simple food to transform into a crispy treat, you might want to check out our guide on making the perfect bagel in an air fryer.
The Right Time and Temp for Any Frozen Wing
Not all frozen wings are created equal, and that's the first thing you need to know to get them perfectly crispy every single time. The approach for a raw, unbreaded wing is totally different from what a pre-cooked, breaded one needs. Get this part right, and you'll banish soggy wings for good.
Think of it this way: raw frozen wings need a two-step dance. First, you cook them at a moderate temperature to make sure they’re cooked through to the bone. Then, you blast them with high heat to render the fat and get that crackly, delicious skin. Pre-cooked wings, on the other hand, just need a quick trip in the heat to crisp up since the heavy lifting is already done.
Raw vs. Pre-Cooked Frozen Wings
The biggest mistake I see people make is tossing any old frozen wing in the air fryer and hoping for the best.
With raw wings, I always start low and finish high. I set my air fryer to 380°F (193°C) and let them go for about 20-25 minutes. After a quick flip, I crank the heat up to 400°F (204°C) for the last 5-10 minutes. This final burst of heat is what gets you that restaurant-quality crunch.
Pre-cooked or breaded wings are way more straightforward. You're really just reheating and crisping, so one temperature gets the job done.
- Pre-Cooked Wings: Go with 400°F (204°C) for 15-20 minutes, and don't forget to flip them halfway.
- Breaded Wings: These brown up fast. I find 390°F (199°C) for 12-18 minutes is the sweet spot.
It's no surprise that the frozen food aisle is now packed with air-fryer-specific products. The boom in home air frying has completely changed the game.
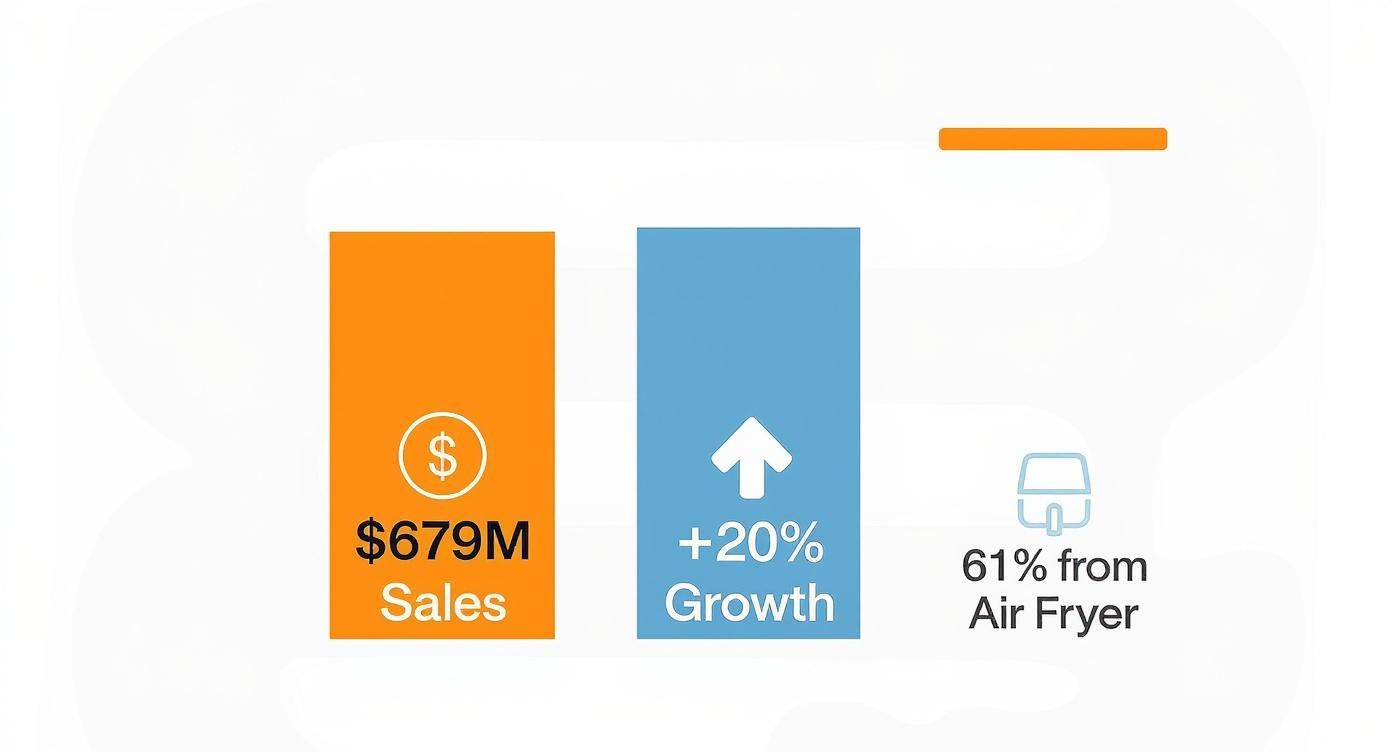
With sales soaring to $679 million, it’s clear everyone wants that easy, crispy snack without leaving the house.
To make things even simpler, here's a quick cheat sheet I use.
Air Fryer Frozen Wing Cooking Chart
| Wing Type | Air Fryer Temperature | Total Cook Time | Key Instructions |
|---|---|---|---|
| Raw, Unbreaded | 380°F then 400°F | 25-35 minutes | Cook at 380°F for 20-25 mins, flip, then increase to 400°F for 5-10 mins. |
| Pre-Cooked, Unbreaded | 400°F | 15-20 minutes | Cook at a steady high heat. Flip them about halfway through the cook time. |
| Pre-Cooked, Breaded | 390°F | 12-18 minutes | Watch these closely as the breading can burn. A slightly lower temp helps. |
This little chart should take all the guesswork out of your next wing night. Just find your wing type and follow the guide for perfect results.
My Two Cents: No matter what the bag says or what a guide tells you, a meat thermometer is your best friend. The only way to be 100% sure your chicken is safe is to check that it’s hit an internal temperature of 165°F (74°C). Just stick the probe into the thickest part of the wing, making sure you don't hit the bone.
Getting That Perfect Crisp: A Step-by-Step Guide
Alright, you've got the time and temperature charts down. Now, let's get into the nitty-gritty of the cooking process itself. Making fantastic wings from frozen isn't about some secret, complicated recipe—it's all about technique. A few simple moves are all that stand between you and perfectly crispy, juicy wings every single time.
First things first: preheat your air fryer. Don't skip this. That initial hit of hot air is what kickstarts the crisping process on the frozen skin. Tossing wings into a cold basket just causes them to slowly thaw and steam, which is the fastest way to get a rubbery, disappointing result.
How to Arrange and Flip for Maximum Crunch
Once the air fryer is piping hot, place your frozen wings directly in the basket. The most important rule here is to give them space. You need a single, even layer.
Overcrowding the basket is a classic mistake. When wings are piled up, they trap steam and block the hot air from circulating. You'll end up with some crispy spots and some sad, soggy spots. If you have to, it’s much better to cook in two separate batches than to cram them all in at once.
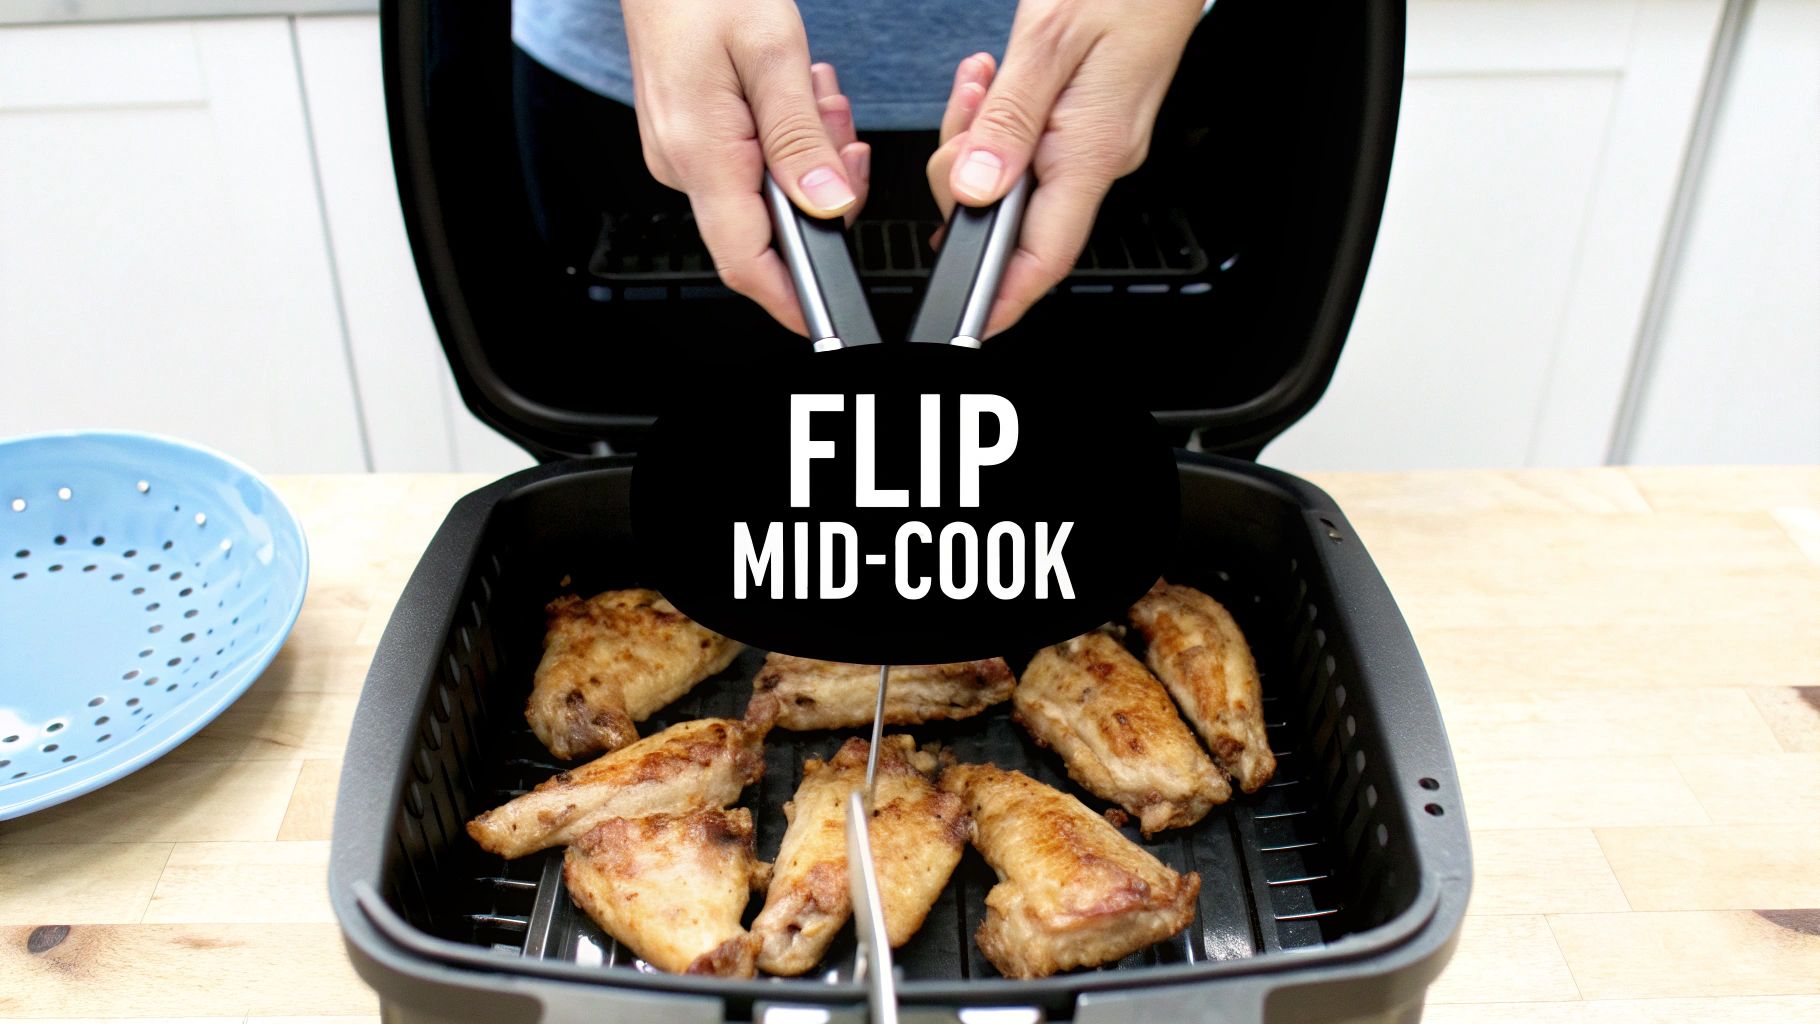
About halfway through the cook time, pull the basket out and give the wings a good flip. This simple action guarantees both sides get that direct blast of heat, which is the key to an even, golden-brown finish.
The goal is maximum air exposure for every single wing. A single layer and a mid-cook flip are non-negotiable for achieving that perfectly uniform, crispy skin on all sides.
The Final, Most Important Check
Looks can be deceiving, but a thermometer never lies. The only way to be 100% certain your chicken is cooked through and safe to eat is by checking the internal temperature.
- The Magic Number: Grab a meat thermometer and make sure the wings have hit a safe internal temperature of 165°F (74°C).
- Proper Probing: Stick the thermometer into the meatiest part of the wing. Just be careful not to hit the bone, as that will give you a false, much hotter reading.
This quick temp check removes all the guesswork. Your wings will be crispy, delicious, and perfectly safe to serve.
Nailing the Flavor: When to Sauce and Season Your Wings
Let's be honest, a perfectly crispy wing is only half the battle. The real magic happens with the seasoning and sauce, but timing is absolutely critical. Get it wrong, and you can kiss that beautiful crunch goodbye.
If you're using a dry rub, you have a bit more flexibility. I like to toss the frozen wings in a little high-smoke-point oil (avocado oil works great) and then coat them in the seasoning before they hit the air fryer. This helps the spices bake right into the skin, creating an incredible, flavorful crust as they cook.
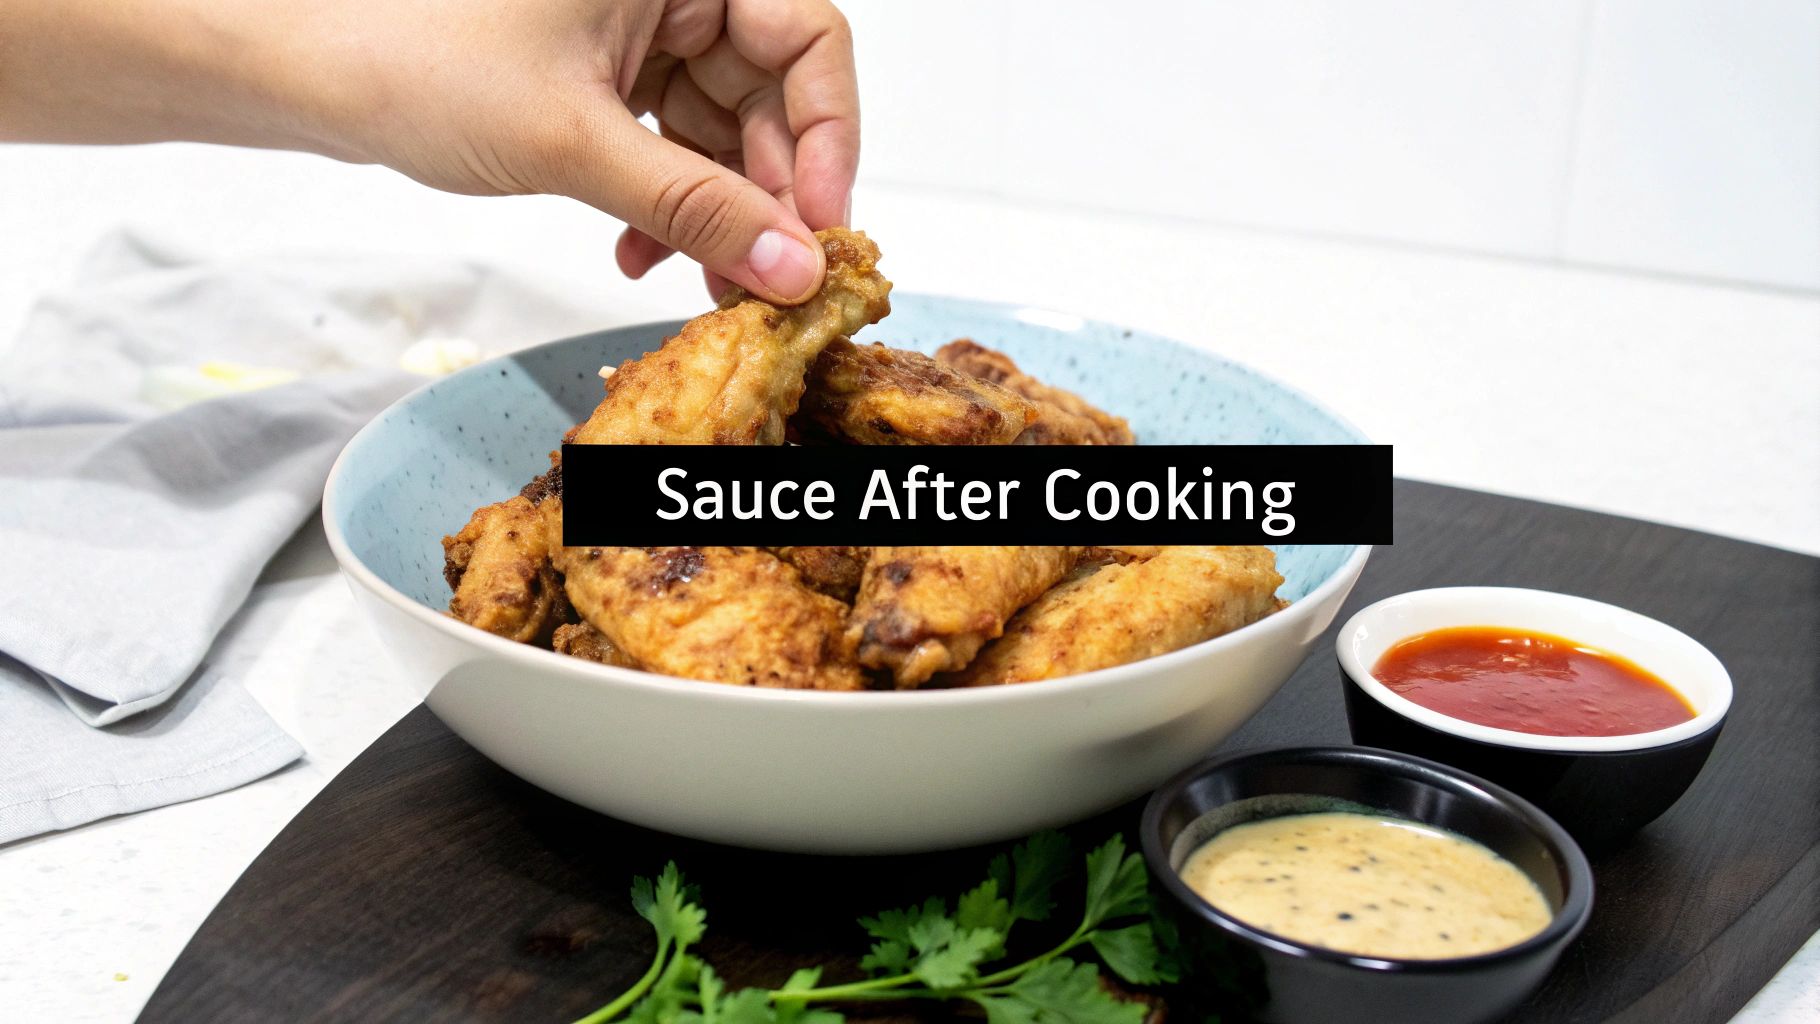
But for wet sauces like classic Buffalo or a sticky BBQ, you have to wait.
The golden rule for saucing is simple: toss the wings after they are fully cooked and crispy. If you add a wet sauce too early, you're just steaming the skin, making it soggy. Plus, the sugars in the sauce can burn and turn bitter under the high heat.
Quick Sauces to Make While Your Wings Cook
You don't need a fancy bottled sauce. While the air fryer is doing its thing, you can whip up something amazing in just a couple of minutes. Here are a few of my go-to recipes:
- Classic Buffalo: Just melt 4 tablespoons of unsalted butter and whisk in 1/2 cup of a good cayenne-based hot sauce (like Frank's RedHot) until it's nice and smooth.
- Sweet & Tangy BBQ: Take 1/2 cup of your favorite BBQ sauce and give it an upgrade. Stir in 1 tablespoon of honey and a splash of apple cider vinegar to cut the sweetness.
- Garlic Parmesan: Melt 4 tablespoons of butter in a small pan, then stir in 2 minced garlic cloves, 1/4 cup of grated Parmesan, and some fresh black pepper.
Wing lovers are getting more adventurous these days, moving beyond the standard options. People are actively seeking out unique, international flavors and are willing to pay for a better wing experience. The market is exploding with new ideas, which you can read about in this report on expanding chicken wing market trends.
What to Do When Your Wings Go Wrong
Even the most seasoned air fryer pros hit a snag now and then when cooking frozen wings. Don't sweat it. Most of the time, the fix is incredibly simple and will get you right back on track to that perfectly crispy skin you're dreaming of.
Let's walk through the most common headaches and how to solve them.
The Dreaded Soggy Wing Dilemma
Nothing is more disappointing than a soggy chicken wing. If yours come out less than crispy, the issue almost always boils down to one of two things: overcrowding or moisture.
When you cram too many wings into the basket, they end up steaming each other instead of getting that blast of hot, circulating air. The golden rule is a single layer, with a little breathing room between each wing.
You might also notice water pooling in the bottom of the basket, especially with wings that have a lot of ice glaze. That's your enemy! When you pull the basket out to flip the wings, carefully drain that water away. It makes a world of difference.
My Two Cents: Seriously, just cook in batches if you have to. An extra 10 minutes is a small price to pay for wings that are actually crispy. It’s the single best thing you can do to guarantee every piece gets that crunchy finish we're all after.
Tackling Smoke and Uneven Cooking
Is your kitchen suddenly filling with smoke? Don't panic. It's almost certainly just fat from the wings dripping down onto the hot heating element. An easy fix I learned a long time ago is to add a tablespoon or two of water to the drawer underneath the basket. The water catches the grease and stops it from burning.
Unevenly cooked wings are another classic problem. One side is perfectly golden, the other is pale and sad. This is usually caused by forgetting to flip them or just the natural "hot spots" in your machine. Shaking the basket and turning each wing over about halfway through the cook time is non-negotiable.
As our team of recipe developers always says, a great result comes from great technique. You can find more practical advice from our authors' tips and tricks.
Common Questions About Air Frying Frozen Wings
Even when you have a great recipe, a few questions always seem to come up the first time you try it. Let's tackle some of the most common uncertainties people have about how to air fry frozen chicken wings so you can get it right on the first try.
Do I Have to Thaw Chicken Wings Before Air Frying?
Nope! In fact, I'd strongly advise against it. Going straight from the freezer to the air fryer is the best way to do it.
The machine's powerful, circulating heat is designed to do the work for you. It thaws and cooks the chicken perfectly while simultaneously drying out the skin, which is the key to getting that crispy finish you're after.
Should I Use Oil on Frozen Wings?
It really depends. A quick spritz of a high-smoke-point oil, like avocado or canola, can definitely help the skin get that nice, even, golden-brown color. It also gives any dry seasonings you're using something to cling to.
That said, if your wings are already breaded or pre-sauced, they usually have enough fat rendered into them that you can skip the extra oil.
My favorite trick for an extra-crispy finish: After the initial cook time, pull the basket and pat the wings dry with a paper towel. Then, pop them back in at 400°F for another 3-5 minutes. This final blast of high heat renders out any last bit of fat and makes the skin unbelievably crunchy.
How Do I Stop My Air Fryer From Smoking?
A smoky kitchen is almost always from chicken grease dripping down and hitting the hot element at the bottom of the machine. It's an easy fix, though.
Just pour a tablespoon or two of water into the bottom drawer of your air fryer before you start cooking. The water catches the dripping grease and prevents it from burning and smoking up your house.
How Do I Get My Wings Extra Crispy?
Getting that perfect, shatteringly crisp skin comes down to a few simple things:
- Don't Overcrowd the Basket: This is the golden rule of air frying. The wings need space for the hot air to circulate, so always cook them in a single, even layer.
- Pat Them Dry: Partway through the cooking process, take a moment to blot away the moisture from the melted ice. A drier surface equals a crispier result.
- Finish with High Heat: As I mentioned before, that final 3-5 minute blast at 400°F (204°C) is the secret weapon for ultimate crispiness.
For more helpful tips and recipes, explore our full collection of air fryer snack ideas on our blog.